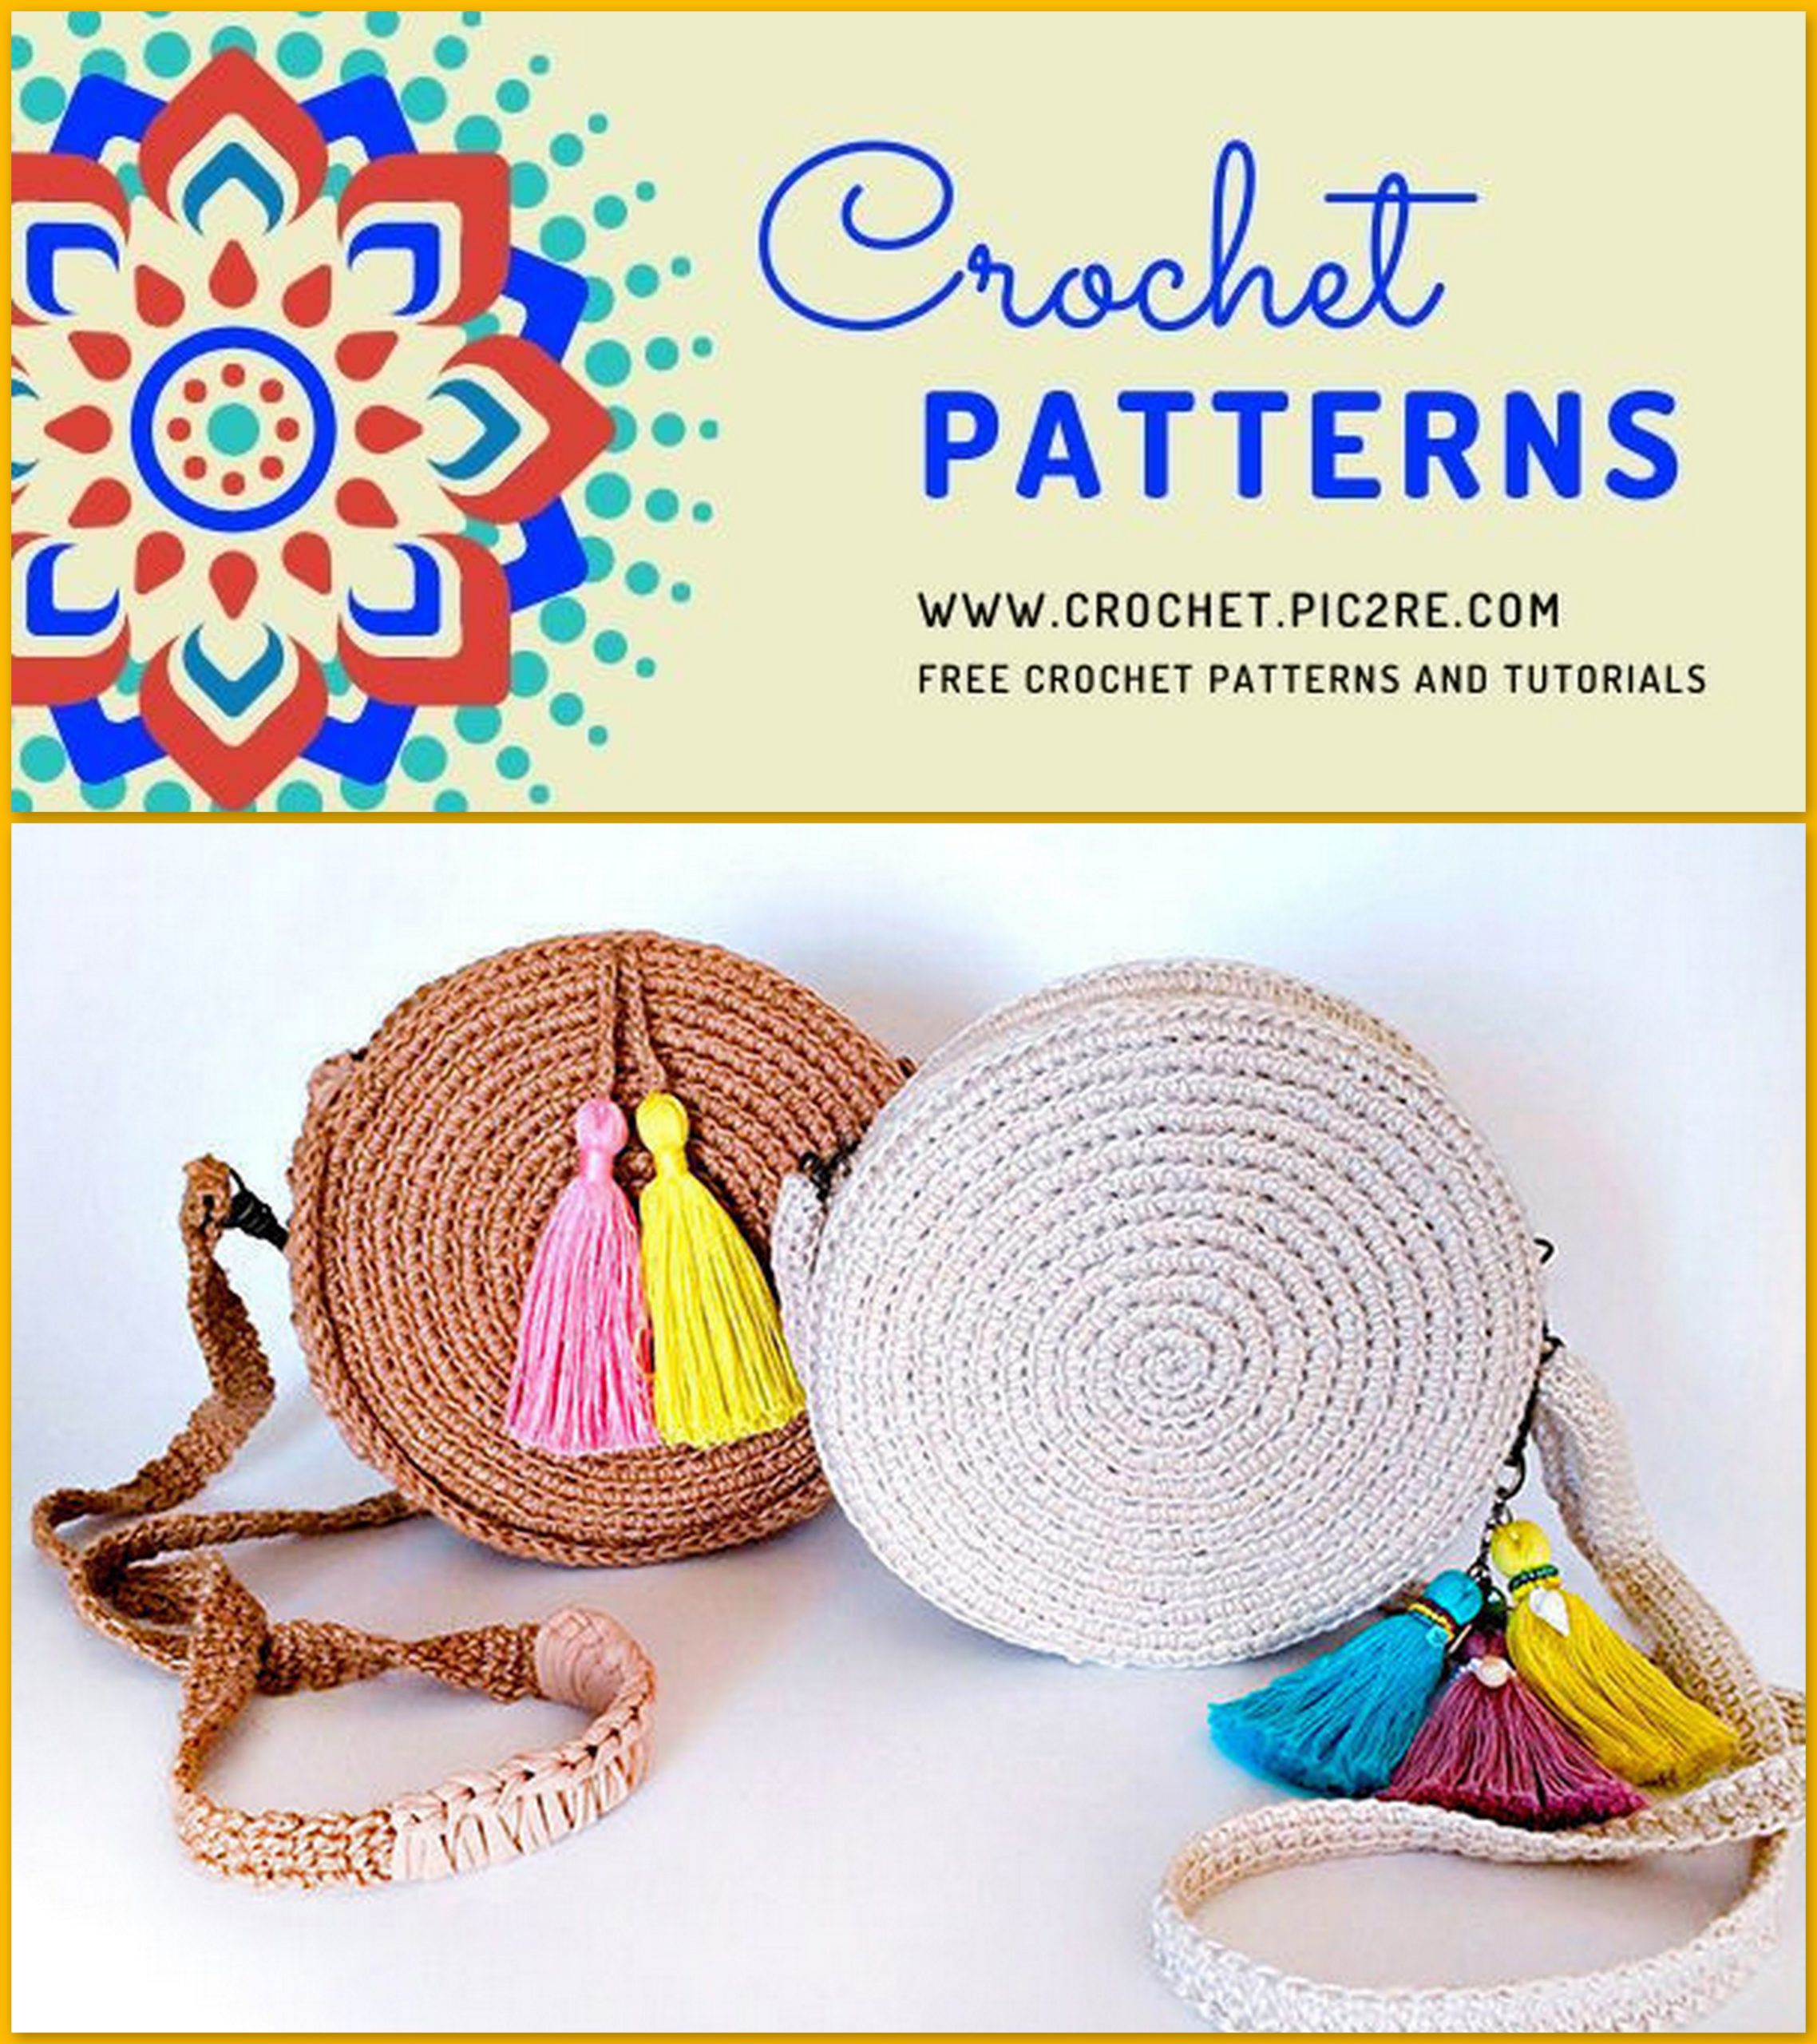
Straw Bag Free Crochet Pattern
In this workshop I will tell you how to make a fashionable round handbag with my own hands 🙂 The bag is crocheted of interesting yarn – jute, and the main feature, the “chip” is the frame, thanks to which the bag keeps its shape perfectly and the knitting is perfectly smoothed and looks so even 🙂
Let’s get started!
Part 1. Materials
1. Yarn Jute, I have the color White (actually milky) It will take 2 and a half hanks.
2. Knitted yarn in jute color, 1 skein.
3. Yarn “Iris”. Used to create a keychain, 3 skeins of different colors. You can also decorate brushes with shells, beads, beads
4.Hook for knitting number 4
5. Wooden blanks – circles 20 cm in diameter (I have blanks for watches). To facilitate the handbag, you can use wood-carved wooden pieces through, or use another material. The main thing is that it is not elastic and holds its shape well.
6. Felt 4 mm thick. It will be as a soft pad, color and thickness of your choice 🙂
7.Carabiners 3 pcs. I have polished bronze, but you can take it in gold or silver. Consider the width of the eye when choosing the size of the carabiner, the handle from the bag should enter there.
8. Zipper 18 cm. The base should preferably be the color of a bag, cloves and a dog, ideally under the light of accessories (I could not find it in bronze). At the expense of lightning, there’s more advice – do not take with metal cloves (it will go as a wave when stitching). I have with plastic cloves.

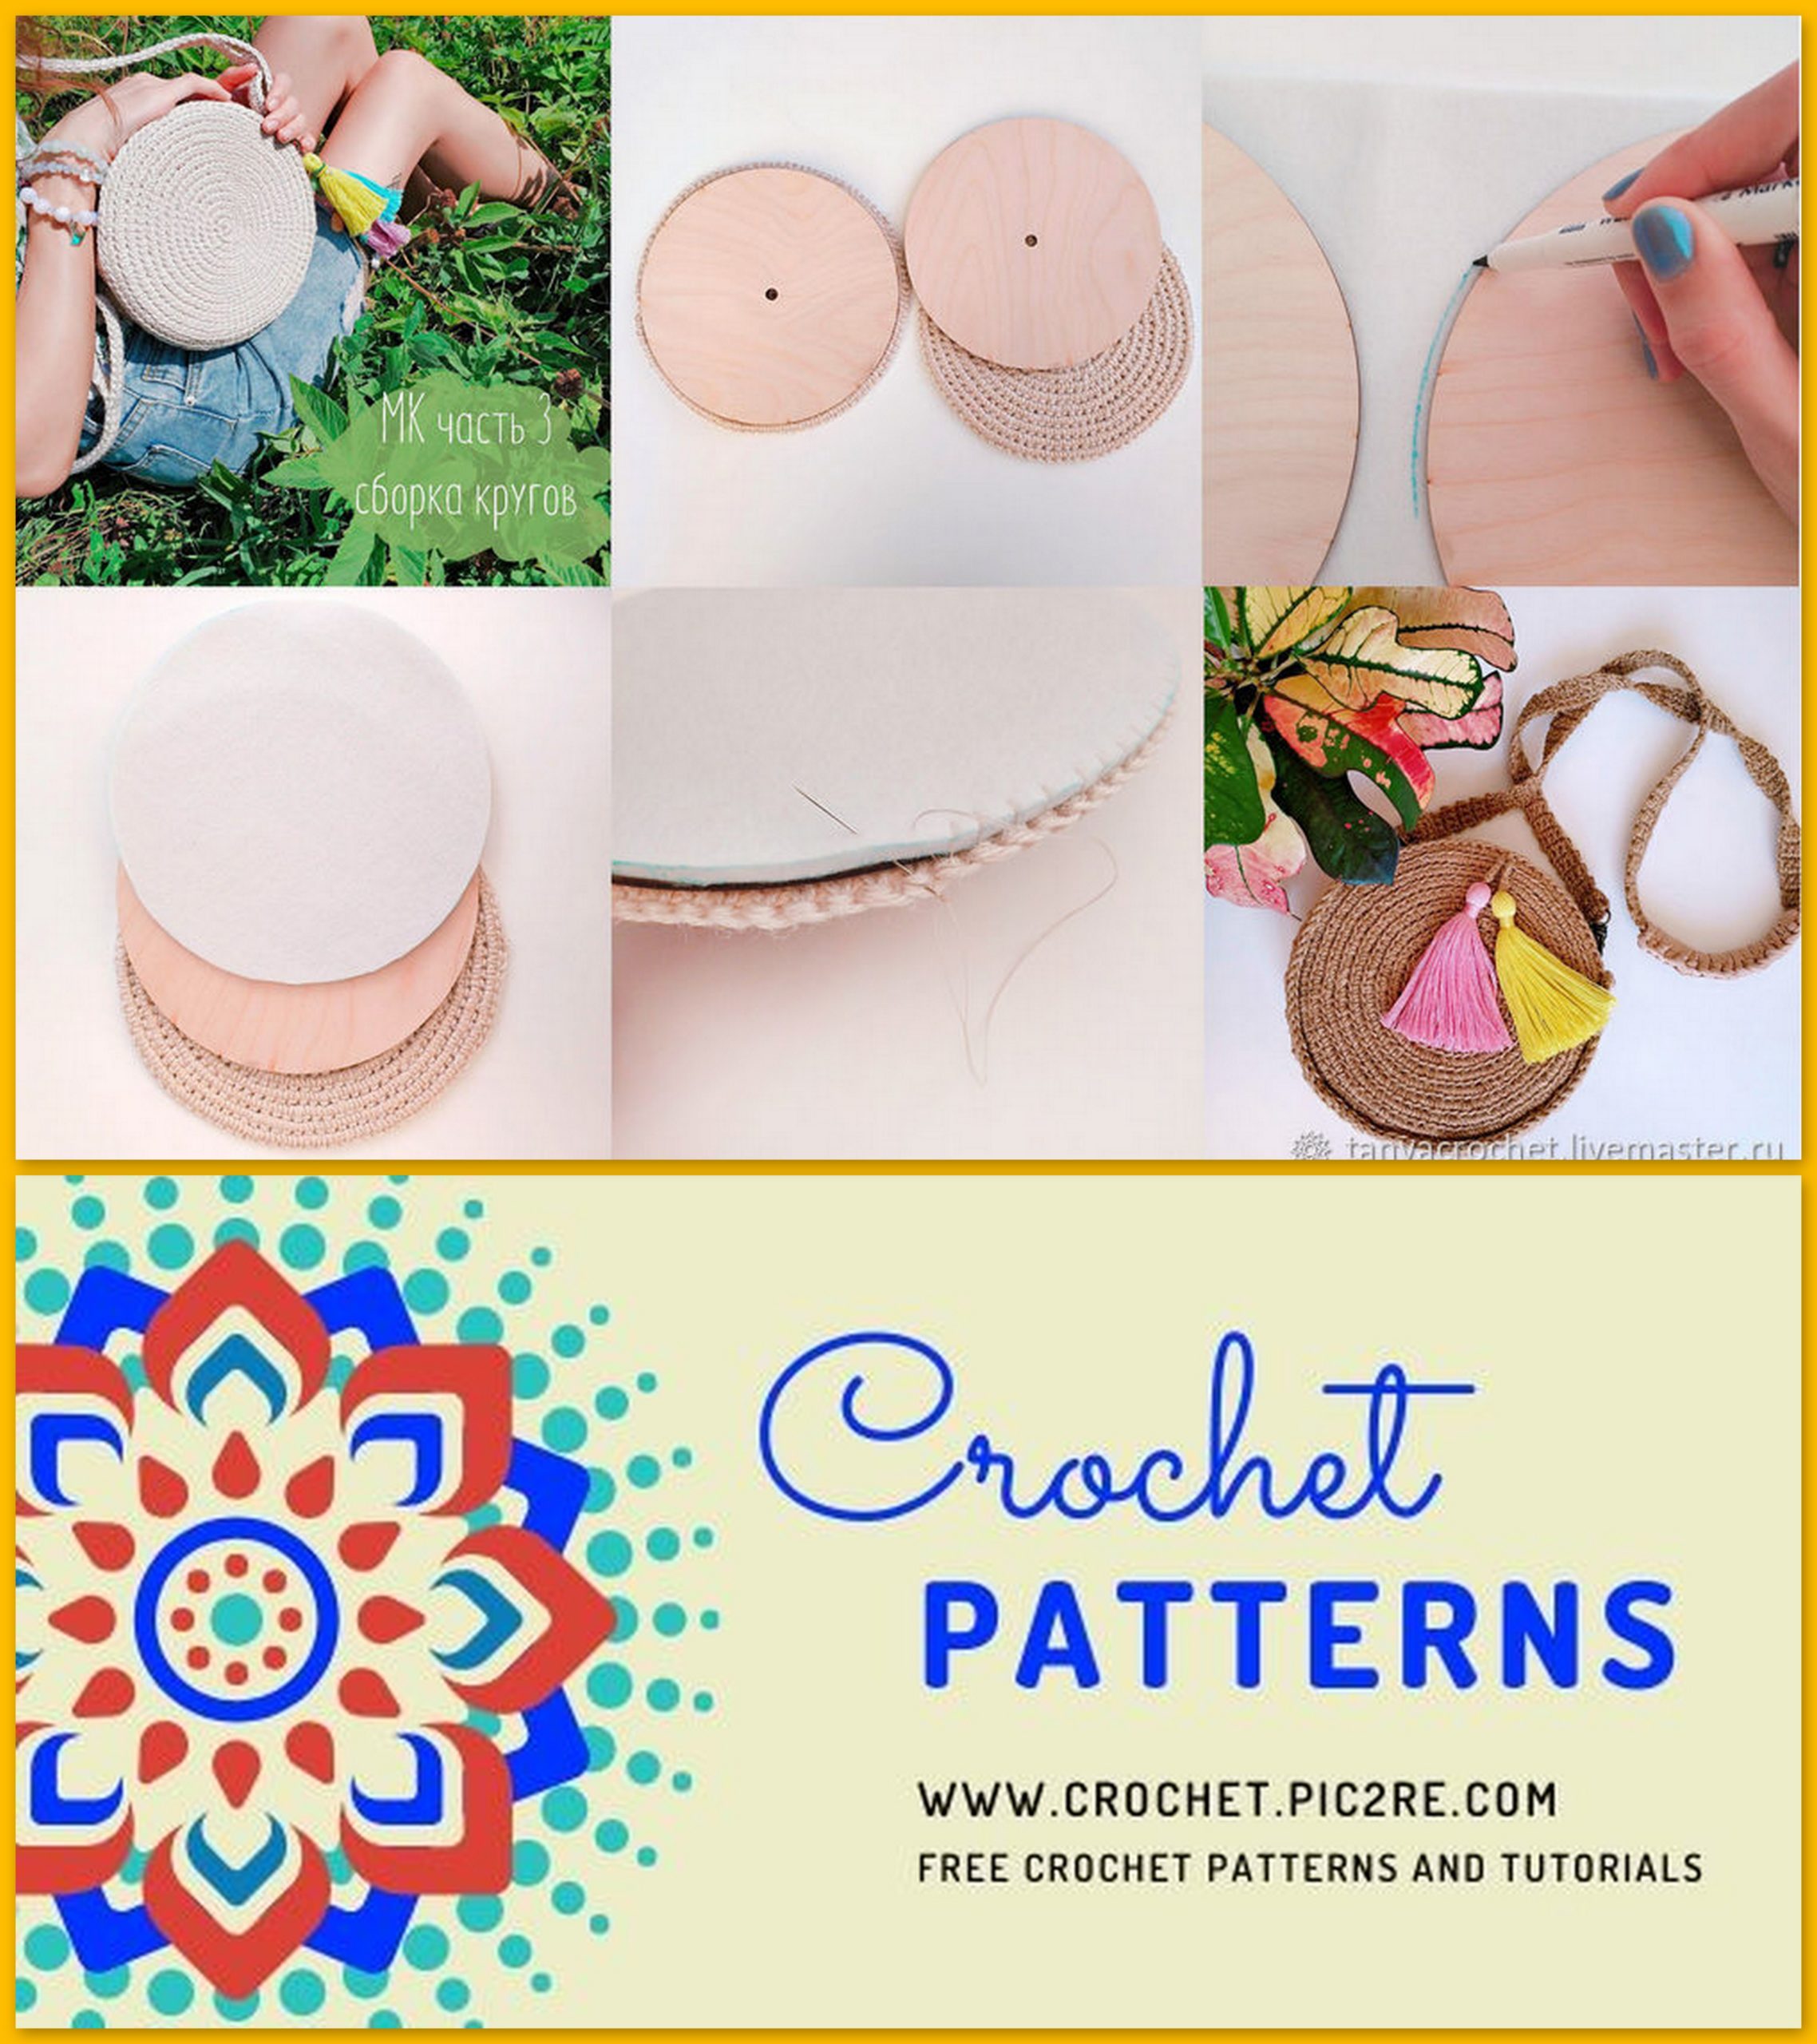
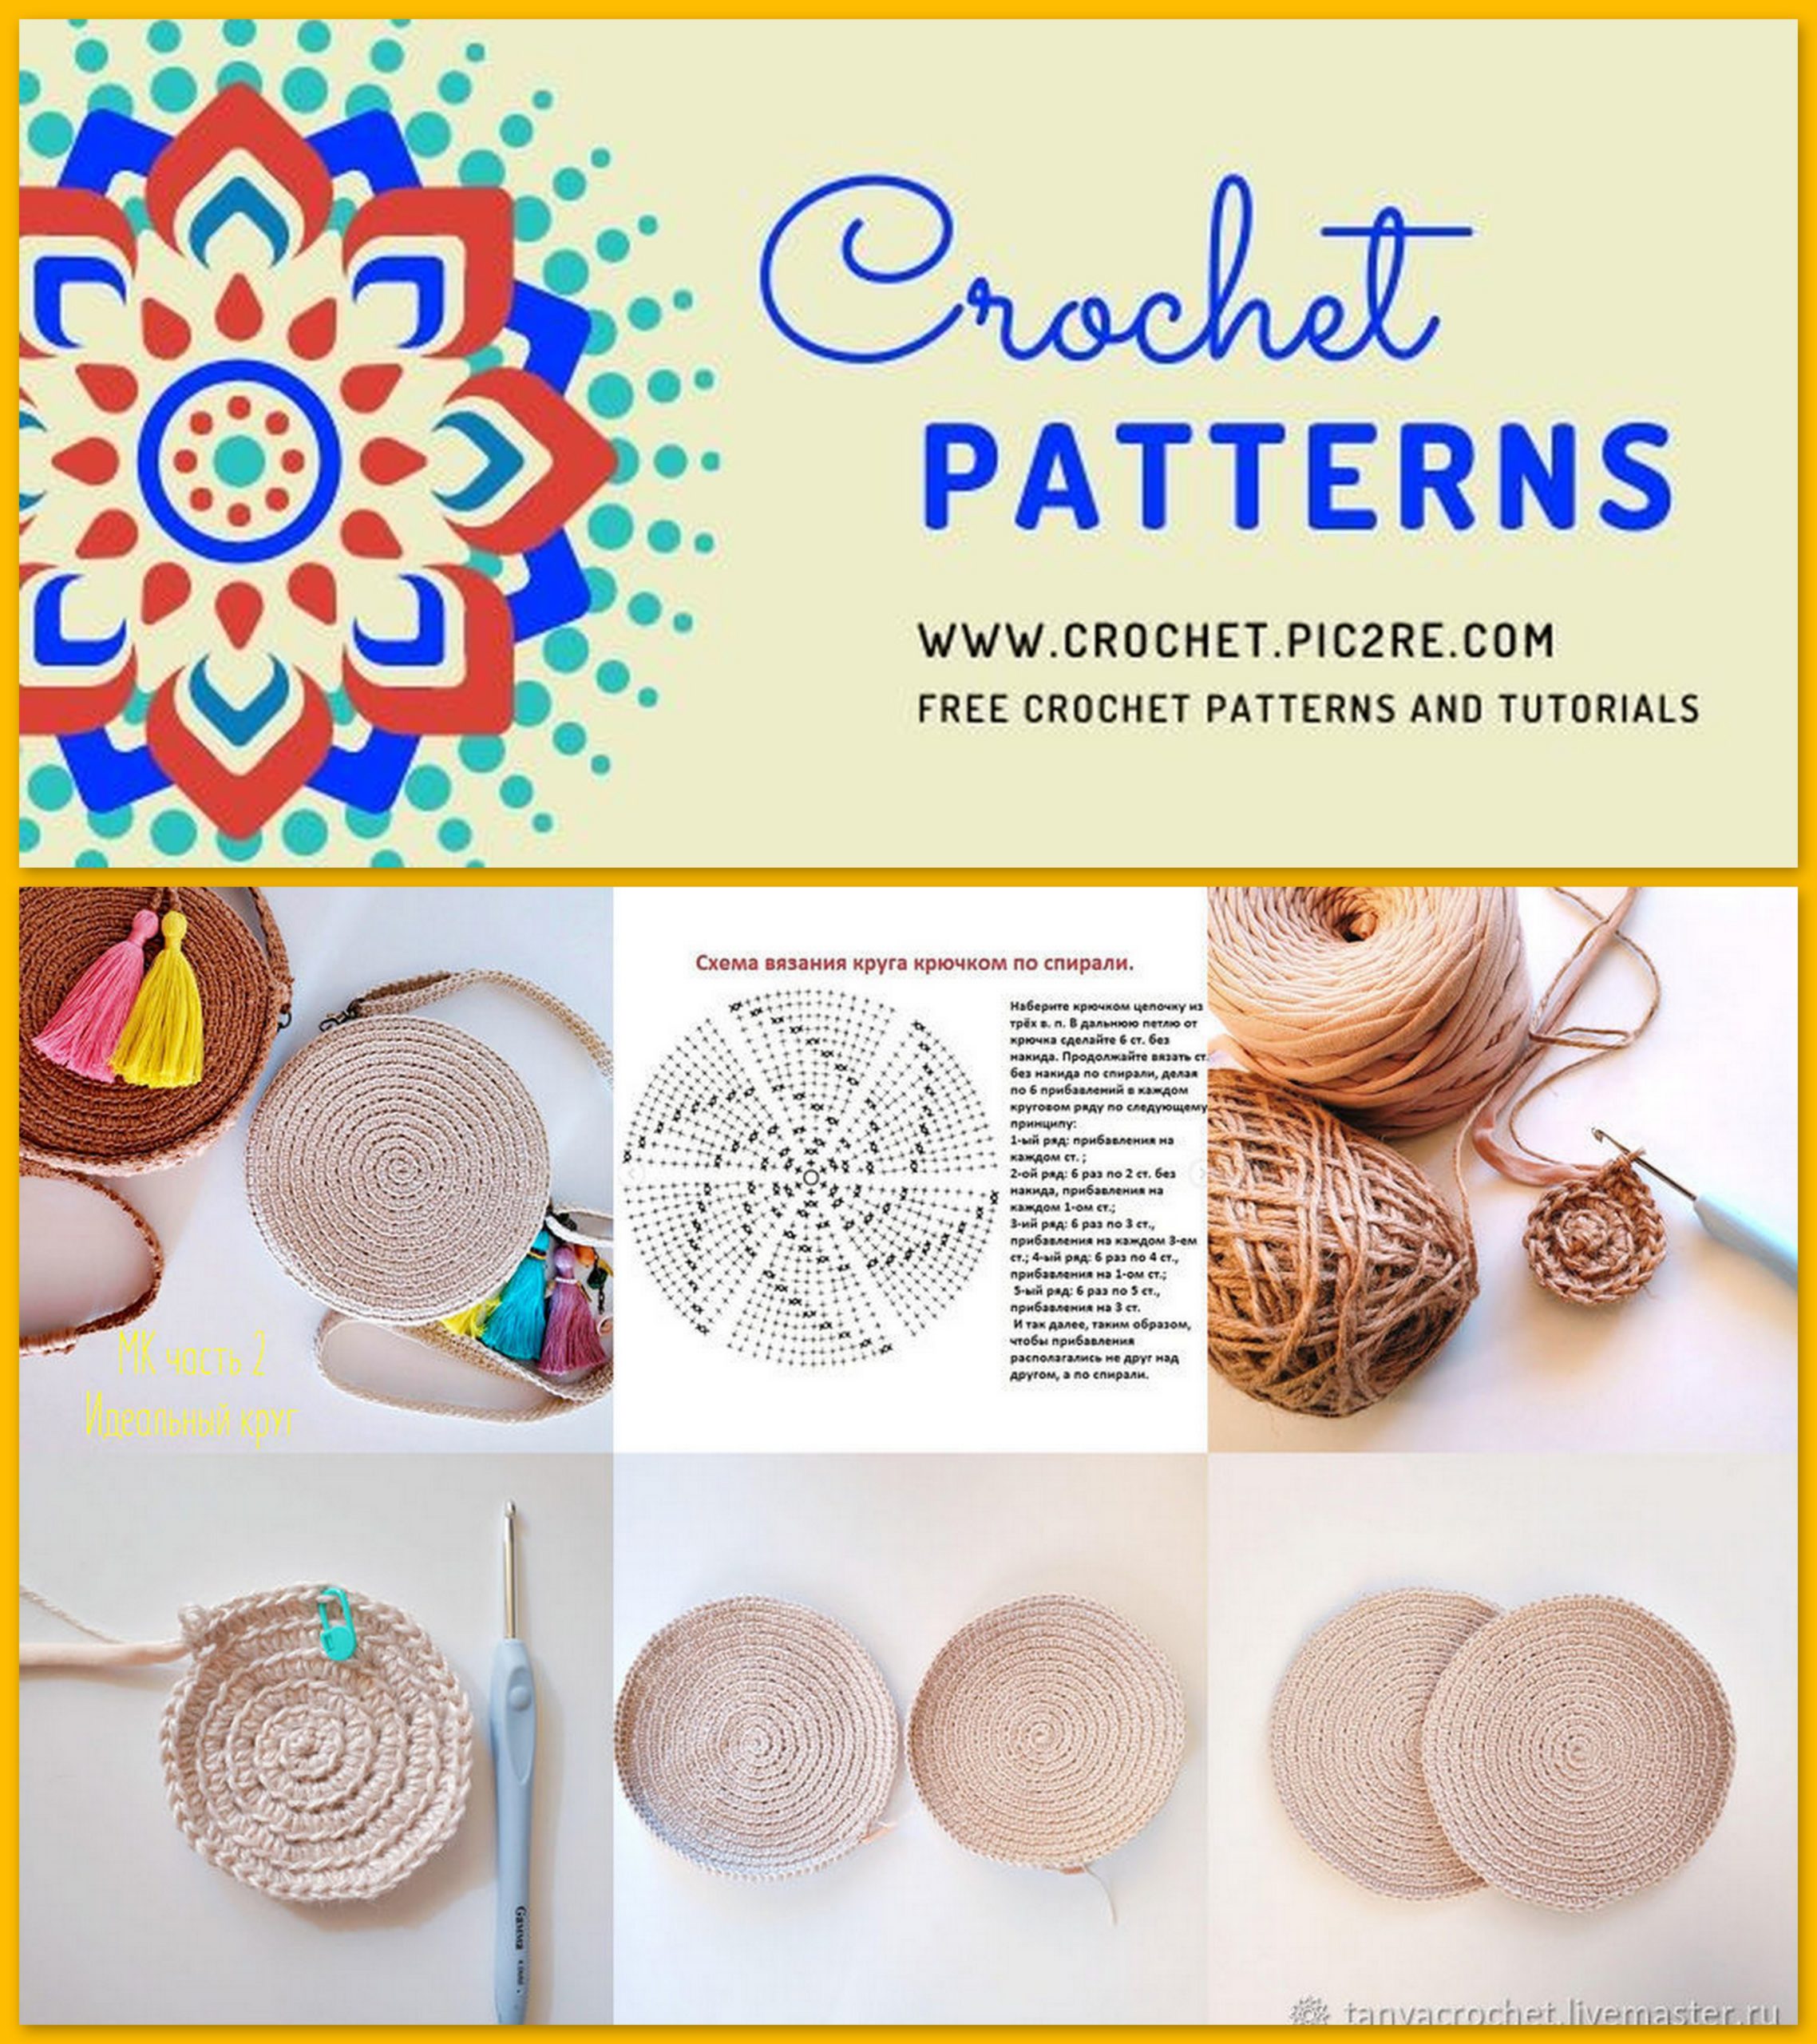

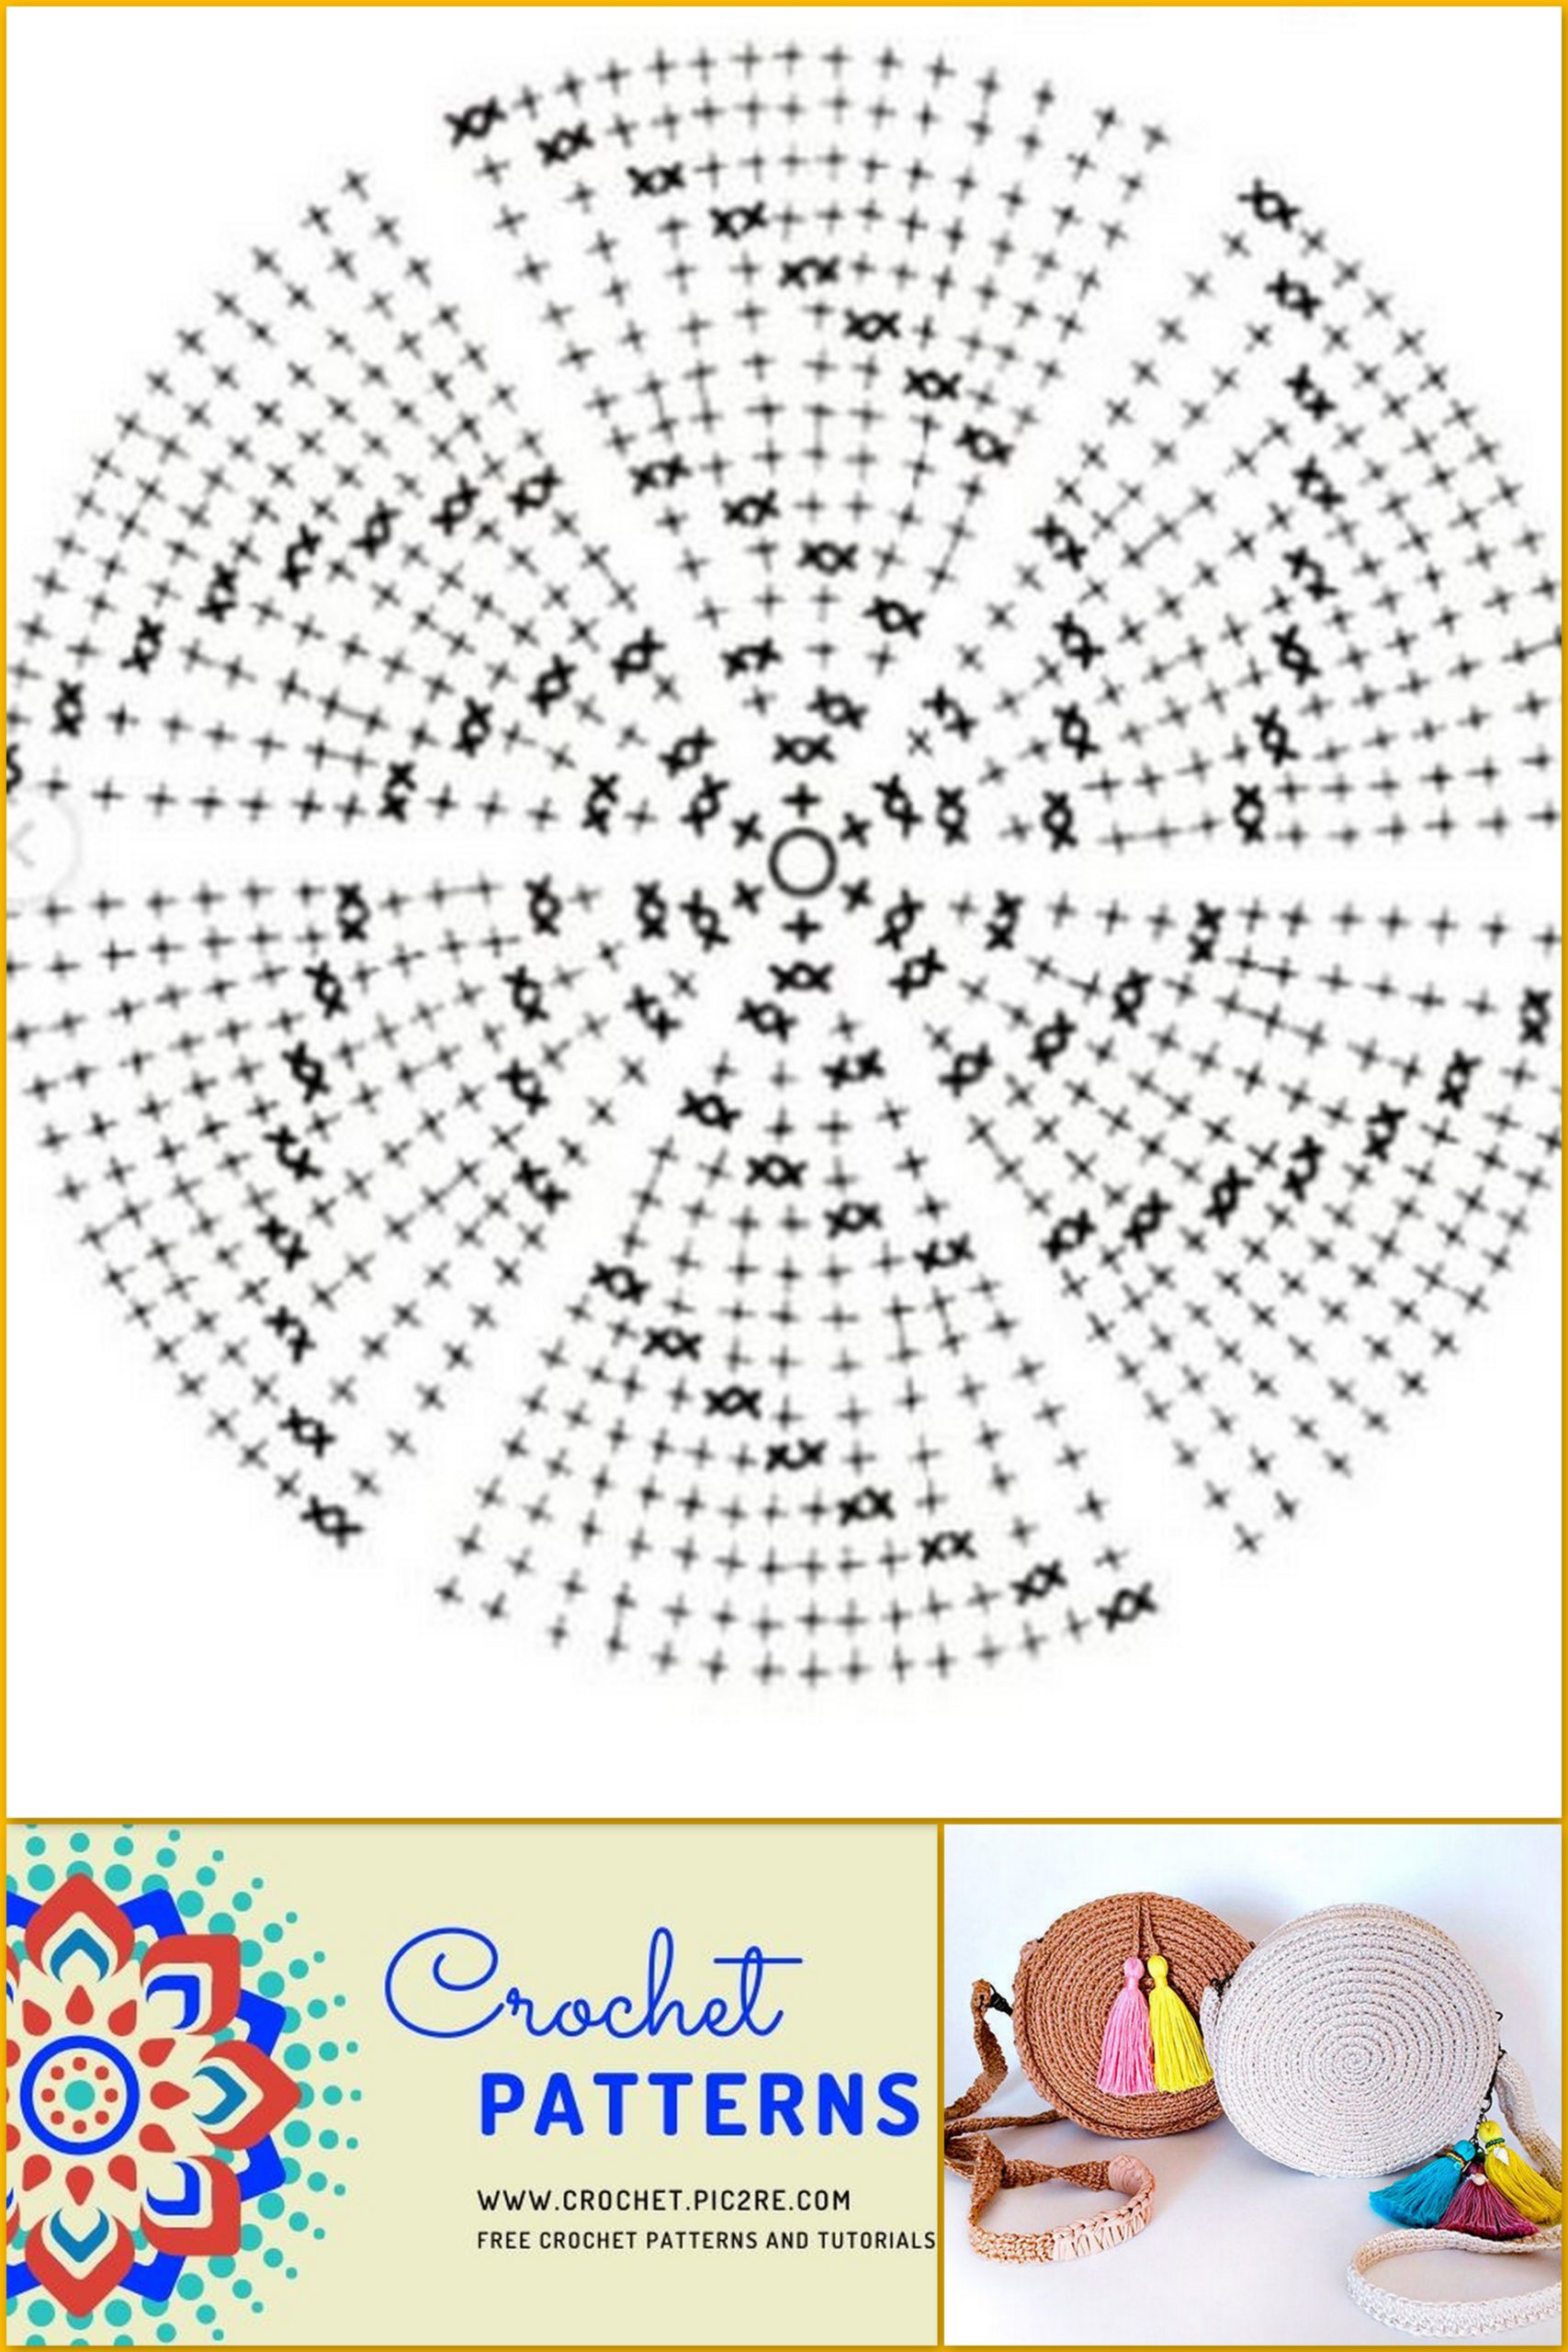
Part 2. Knit circles
We knit circles in a spiral, along the top of knitted yarn according to the pattern that I attached to the template for this master class (t-yarn is laid in a spiral in the process, it is not necessary for her to knit). I want to note that I did not manage to knit very smoothly, starting from 6 st. (on the principle of amigurumi) Through trial and error, I started the circle all the same with 8 senior art. Further according to the scheme, but 8 increases in each row are obtained.
1. Knit to a diameter of 20 cm, try on a wooden billet) It is desirable that the knitted circle was a little more than a wooden one. To do this, you can knit half the final row.
2. It is not necessary to knit directly clearly following the pattern. If you feel that the circle is in a wave, knit a row without increments. The main thing is that you like the result.
3.Fix the marker as a guideline where the new row should begin. Without it, it is very difficult to determine if knitting in a spiral, it is very difficult. If there is no marker, you can use a regular pin.
4. Ready-made circles (2 pcs.) Should be solved and steamed with an iron on the left side! Jute is surprisingly malleable to a couple of material)) I really liked this process 🙂
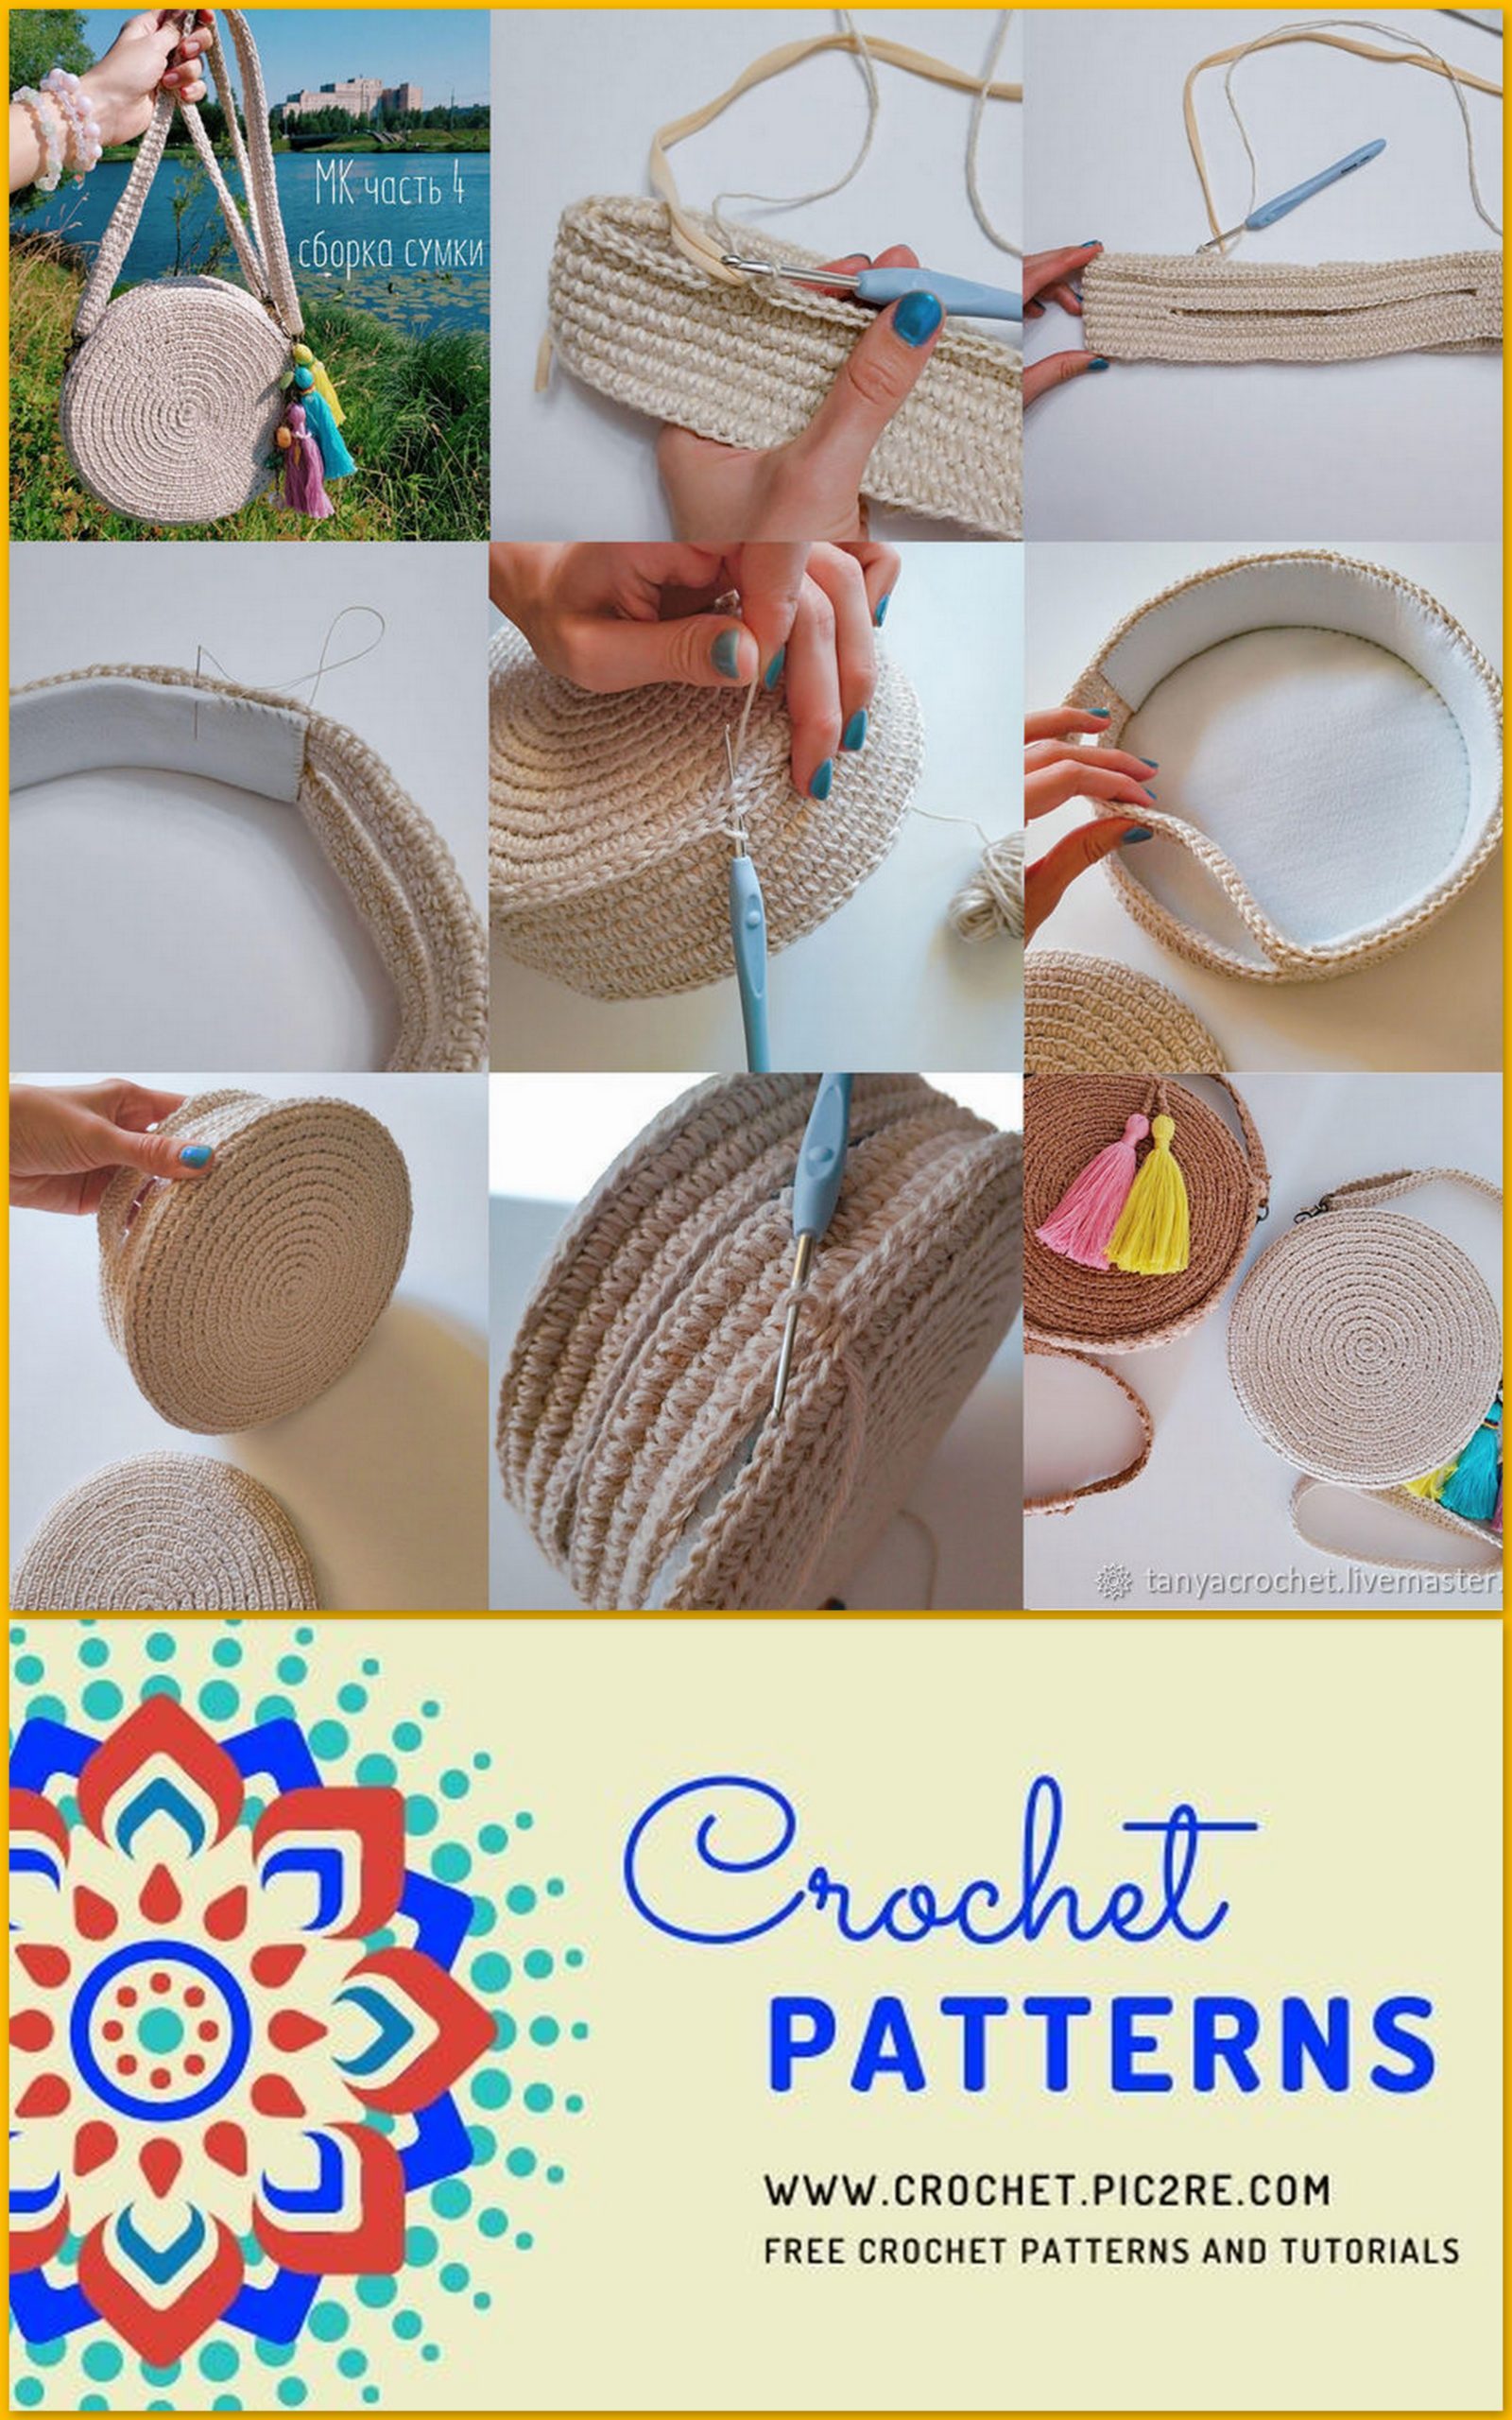
Part 3. Build circles
1. As I wrote earlier, a knitted circle should be slightly larger than a wooden one.
2. Make two circles of felt, for this we circle a wooden circle with a slight indentation. I use a disappearing marker (sold at sewing stores). Cut circles with scissors.
3. A layer of three circles is obtained. Wooden in the middle.
4. Sew a thread with a needle along the edge of a circle of felt and knitted. Done!
P.S. Yes, the design will turn out to be quite dense, but the knitted circle will not bend, align and ideally be fixed on the tree. As I wrote above, instead of a tree, you can insert something else, fantasize 🙂
Part 4. Bag assembly
1. The base of the bag. We knit a chain of airborne equal to the number of columns in the last row of the circle.
2. We bind together with so-called yokes with columns of b.s.
3. Width – at your discretion.
4. Do not forget to make a hole in the middle, 18-20 cm long (equal to the length of the zipper) At this point, do not knit a row, but instead make a chain from an air loop. the next row will be knitted along this chain.
5. The resulting ring base is steamed / ironed.
6. Cut and sew on felt. In the place of lightning, I do not use felt.
7. With a thin hook we connect the base with circles. I introduced the hook for 3 loops, pulling a loop out of them, see photo (half columns). It may be necessary to sometimes make reductions, you will understand this in the process of knitting.
8. Connecting all the parts, you get such a cool “cookie”.
P.S. At the Brown bag, the bottom is knitted with rotary rows with knitted yarn + 1 jute thread. Felt in the base was not used.
Part 5. Sew Lightning
I have a separate video master class on how to sew a zipper just on the example of this handbag, you can watch it here >>
Part 6. Knit a handle
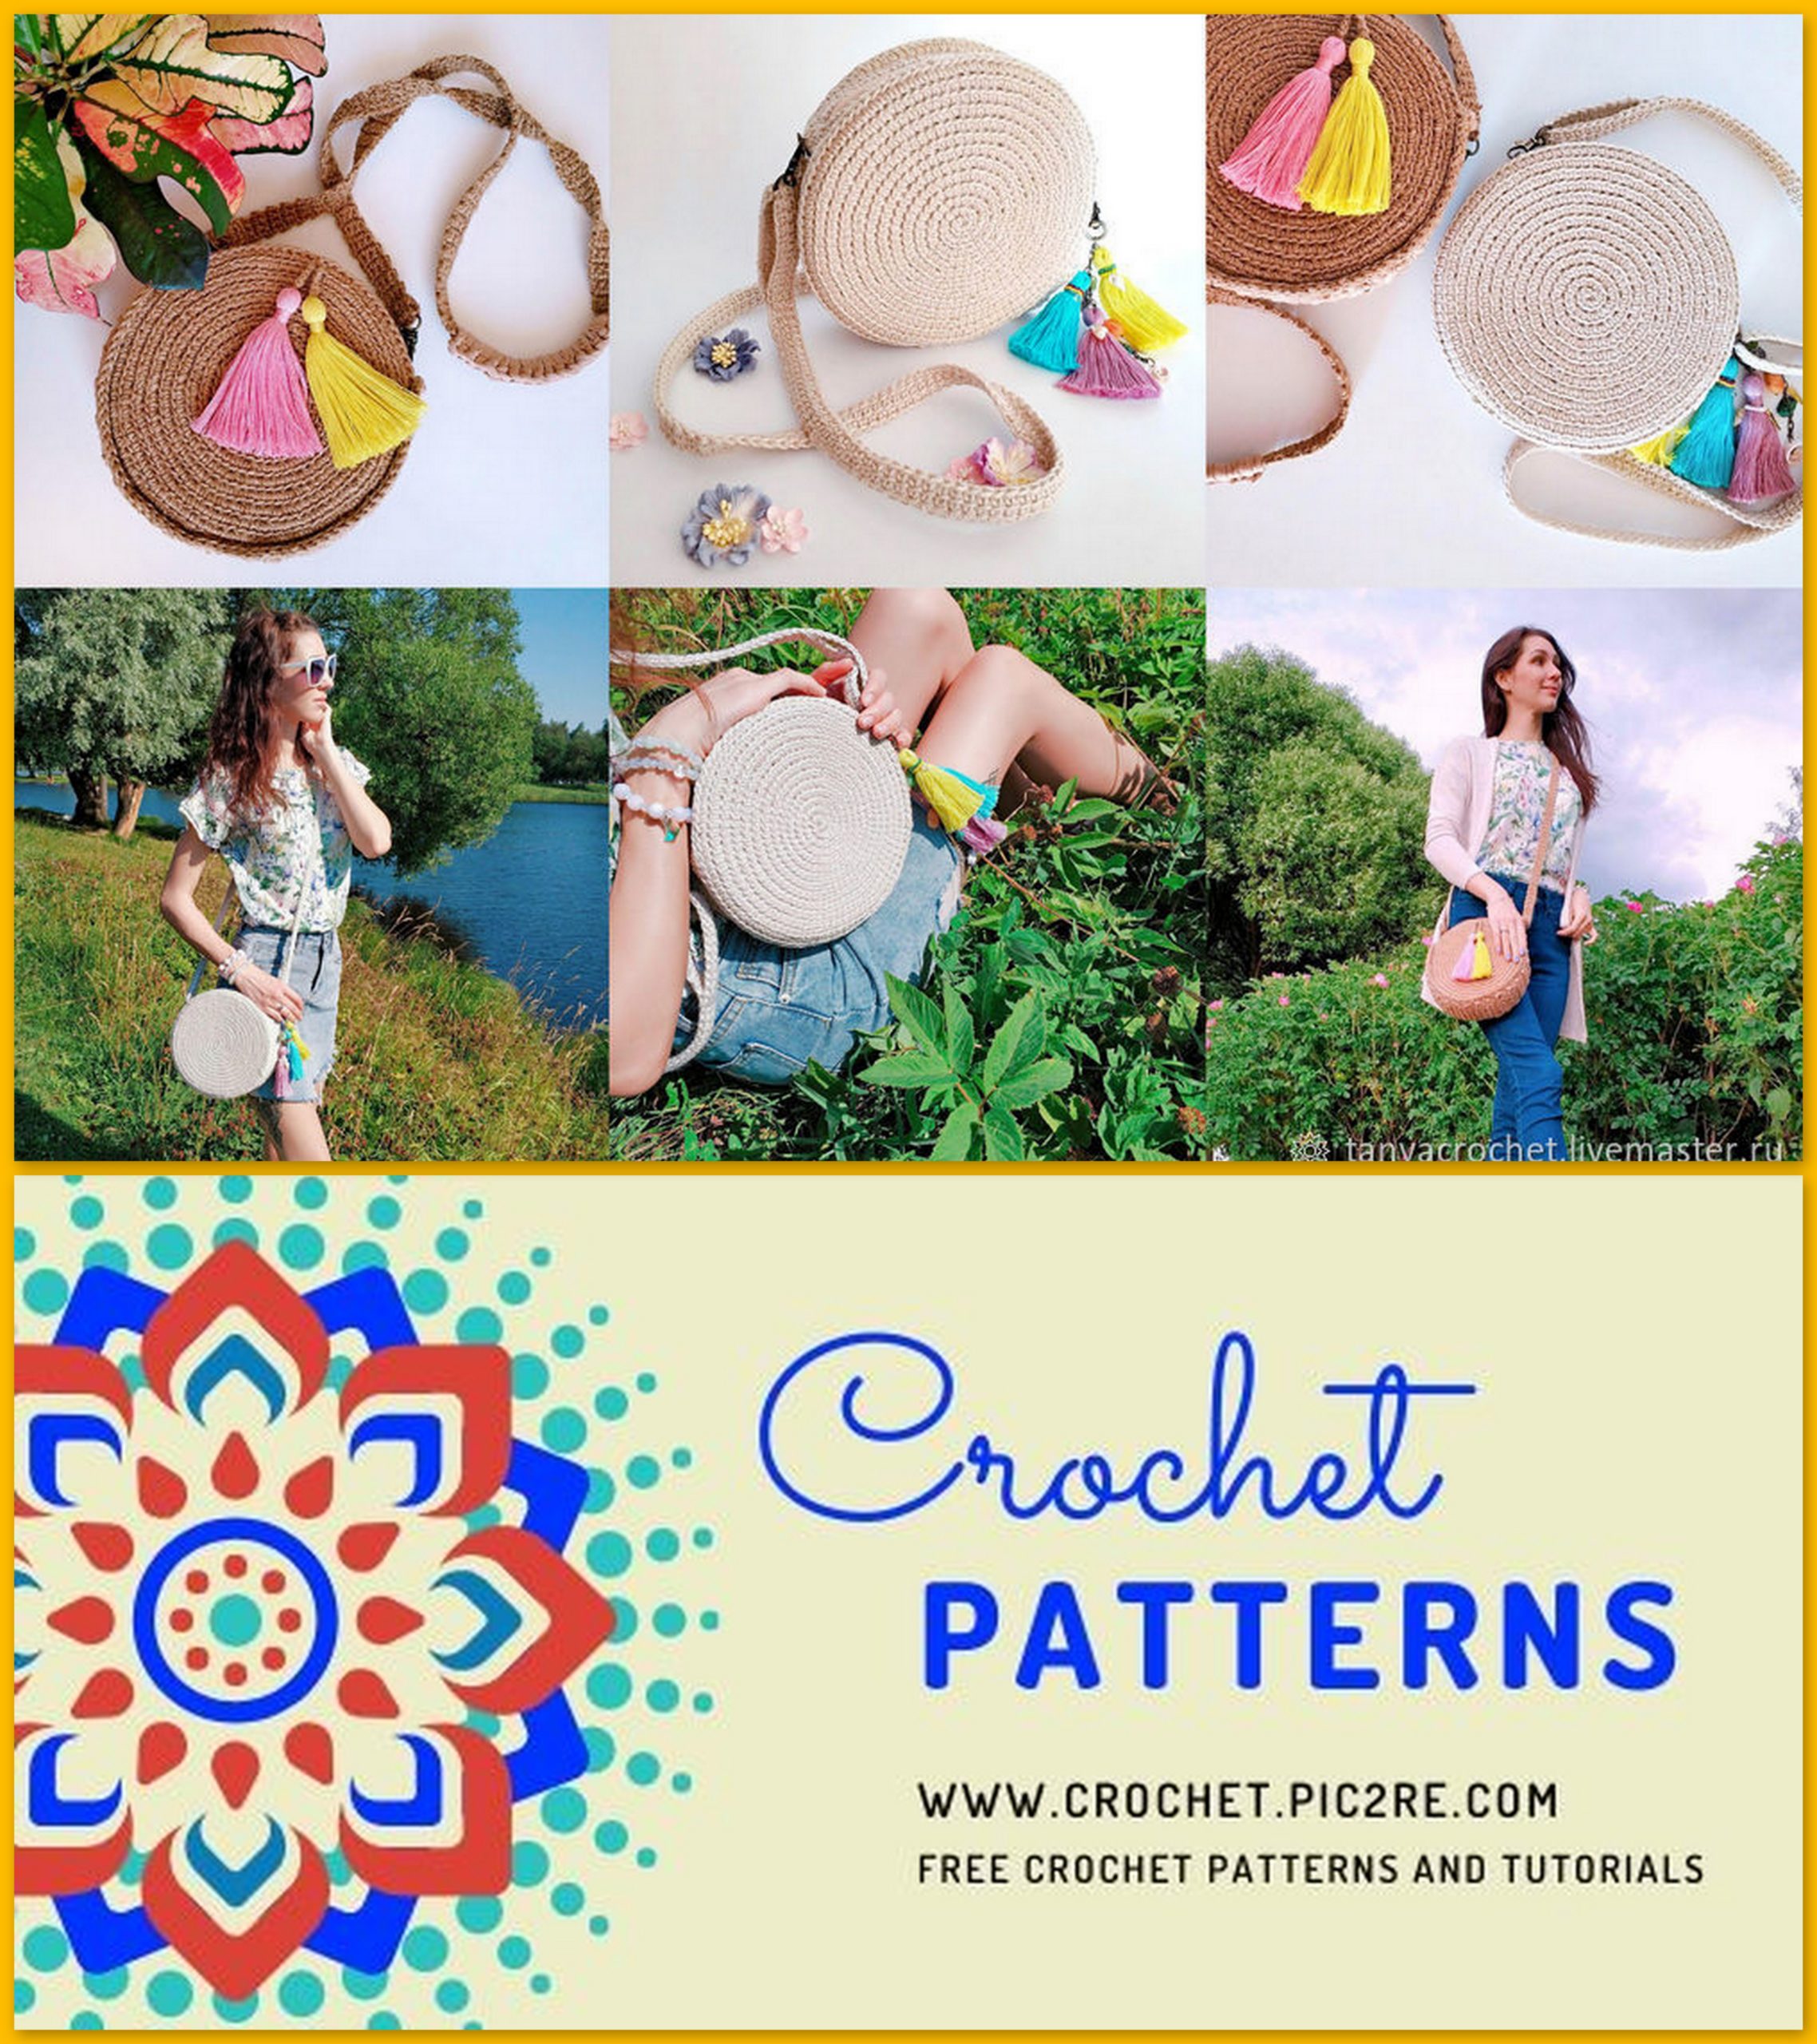
I love shoulder bags, so I always knit them long. But here it should be noted that the handle will go in and fasten through the carabiner, which means that approximately 5 cm on both sides of the handle must be added to the total desired length. I usually have a handle length of 120 cm +/- 10 cm, depending on the size and model of the bag. It should also be borne in mind that knitting under heavy weight.
How to knit
I probably will not go into details, since each master will choose the most suitable option himself, and I will write a few techniques that I tried myself:
1. Handles with Tunisian knitting, as I have for MK bags, I knitted on 4 loops.
2. Turning rows of St. BN, like a bag in the first photo in the collage.
3. The cord “Caterpillar.” Used this method for a bag with a lace insert. Very M he doesn’t like how to tie – by the name there is a bunch of videos on the Internet.
I’m sure there are many more options, which one to choose – you decide 🙂
Mount
After you have brought the edge of the handle into the carabiner, we tighten the cm by 5 and sew it tightly with yarn or thread to match. The carabiner can be fixed either to the handbag itself or to a half-ring, as in the photo in the collage above.
Part 7. Making a bright tassel keychain
For a beige bag I made a bright keychain from tassels, and for this I needed a third carabiner 🙂 For a light brown bag I also made two large tassels, but they do not come unfastened.