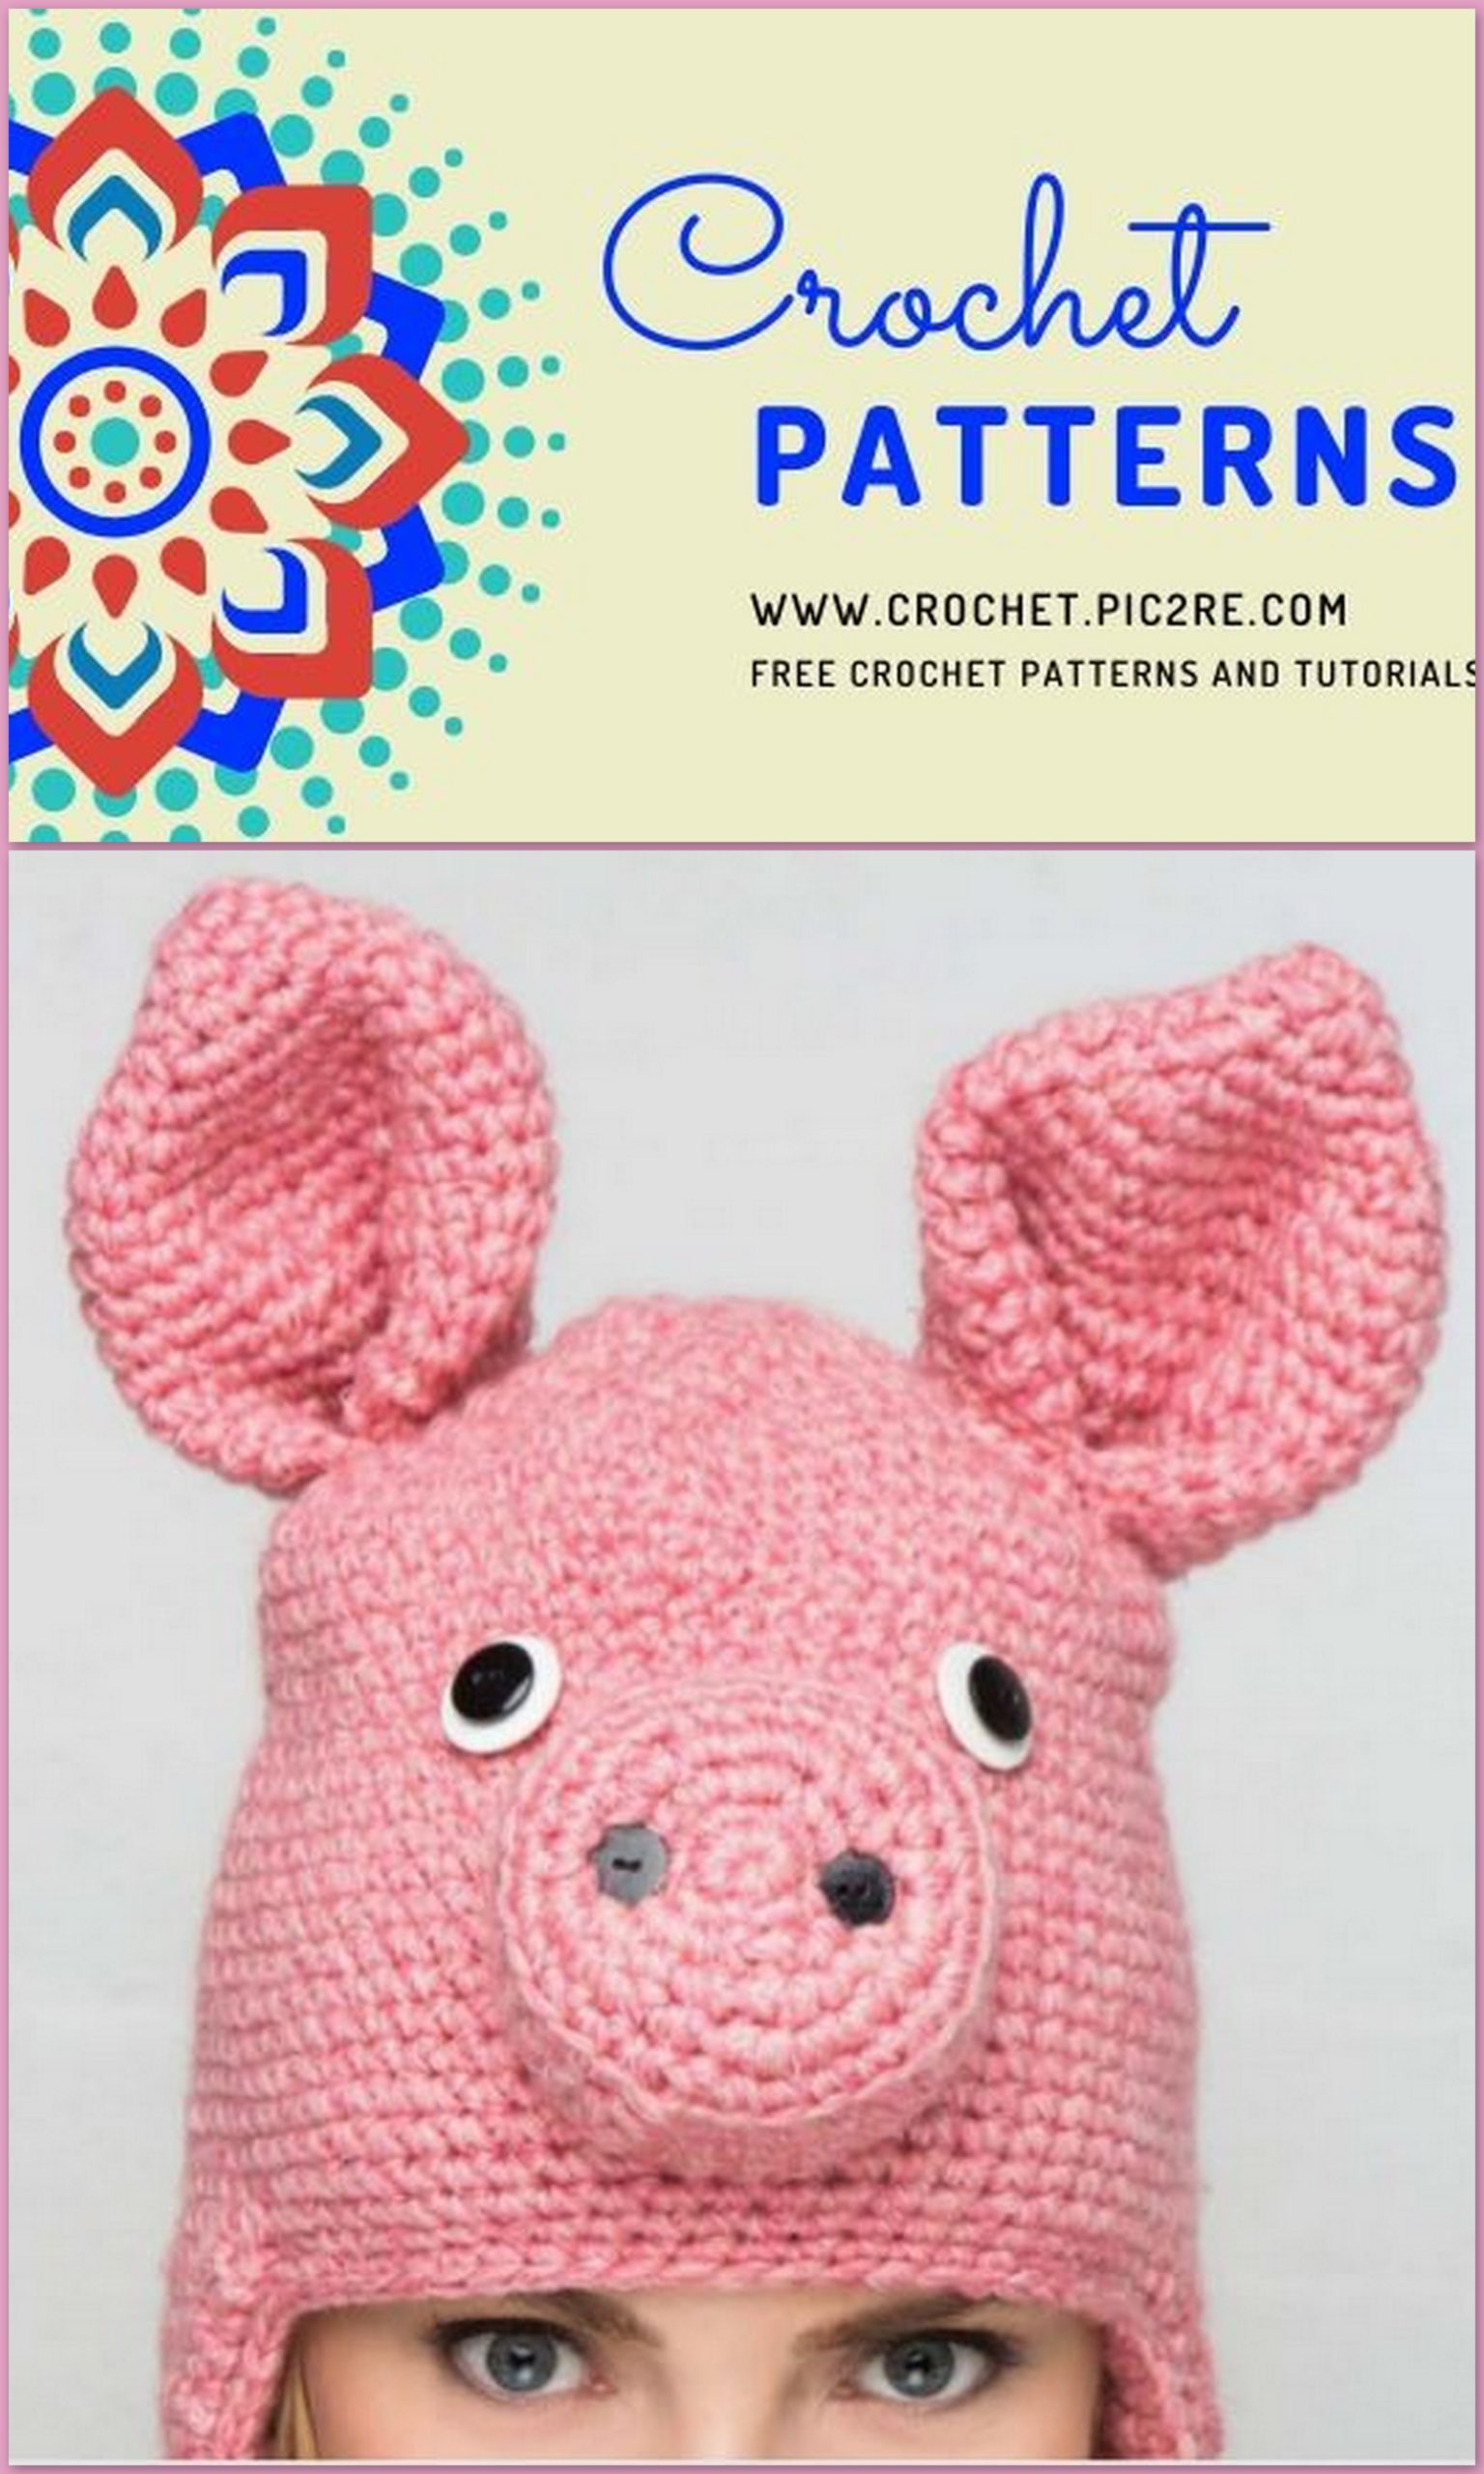
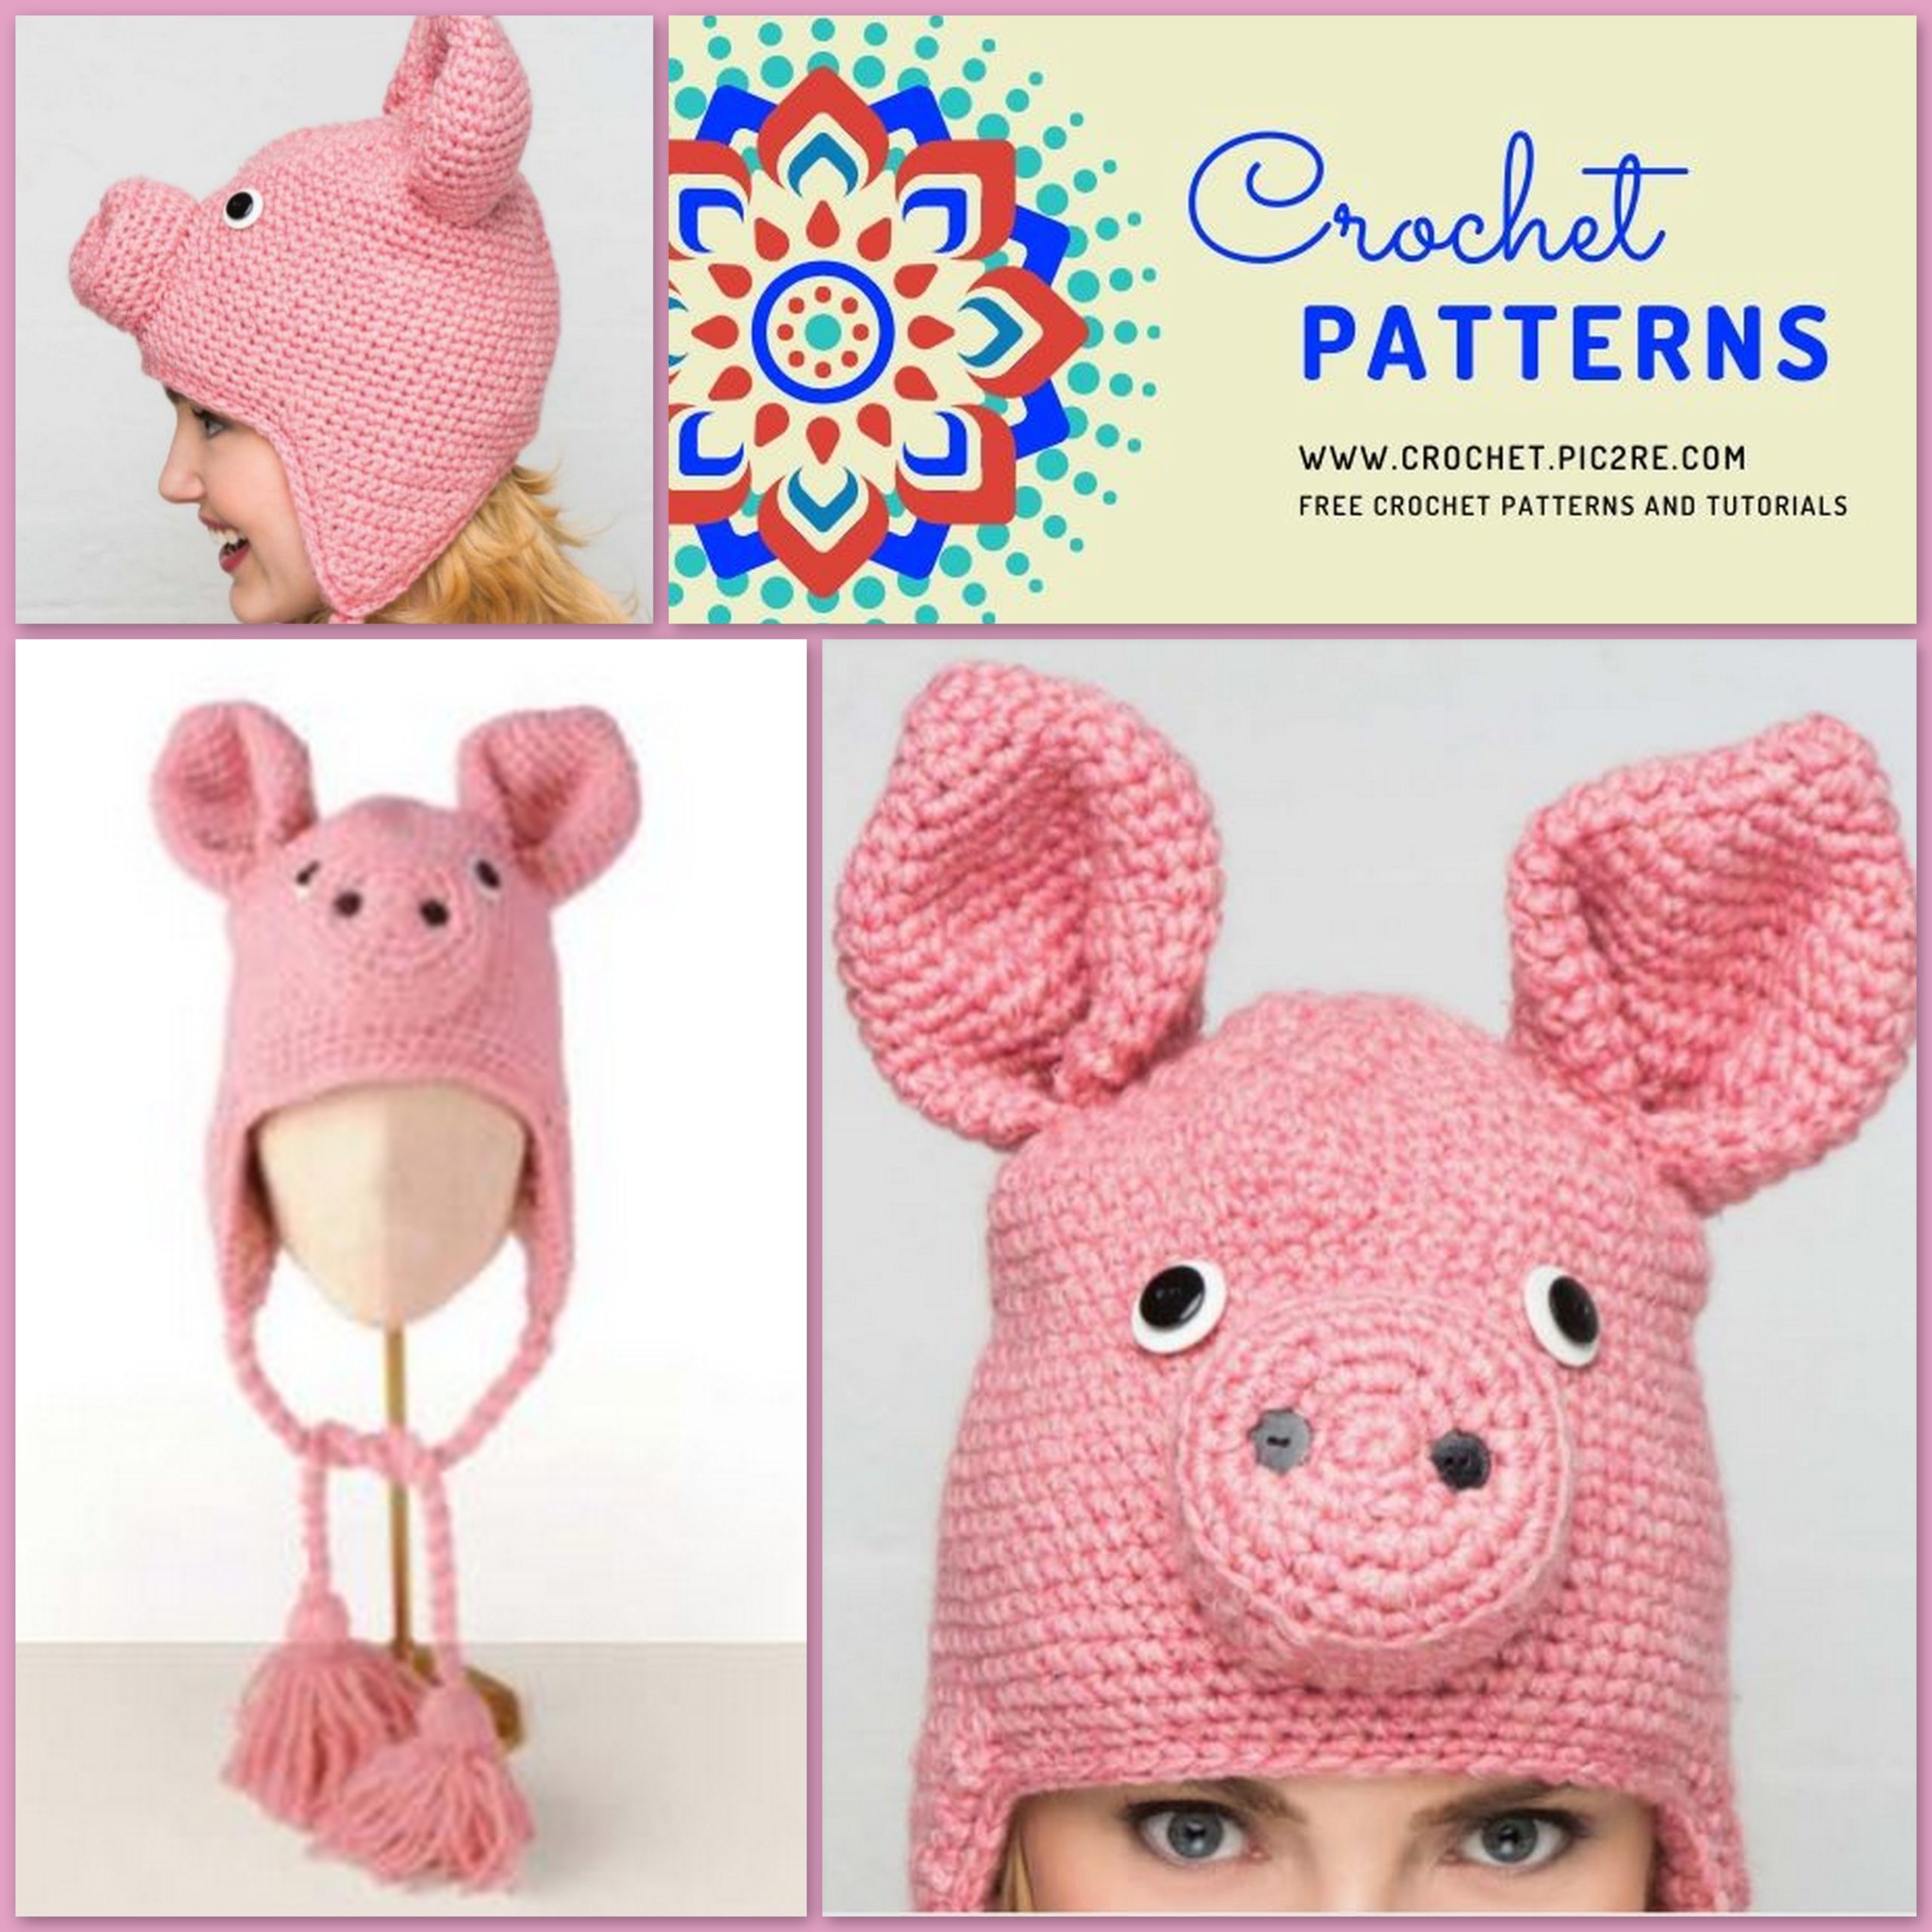
Amigurumi Pig Beret Free Crochet Pattern
We share a wonderful crochet beret pattern for you. You can browse our website for beautiful crochet patterns.
It’s a classic pink pig! For a variation on this style, crocheted in a uniform colour, you could substitute one ball of yarn for a lighter or darker shade of pink to finish the edging, cords and tassels.
MATERIALS
Bergère de France Duvetine, 73% acrylic,
19% polyamide, 8% polyester (76yd/70m per 50g ball)
4[4] x 50g balls in 24609 Petale (A)
4mm (UK8:USG/6) and 5mm (UK6:USH/8) crochet hooks
2 x white ¾[⅞]in (2[2.25]cm) diameter buttons
2 x black ½[⅝]in (1.25[1.5]cm) diameter buttons
2 x black ½in (1.25cm) diameter buttons for nostrils
Darning needle
Sewing needle
Black thread
Small amount of toy stuffing
Thin card to make tassels
SIZES
To fit: child, up to 20in (51cm) head circumference [adult, up to 22in (56cm) head circumference]
TENSION
13 sts and 14 rows to 4in (10cm) over double crochet on 5mm hook. Use larger or smaller hook if necessary to obtain correct tension.
METHOD
The ears, snout and main part of the pig hat are worked in rounds of double crochet. The ears are lightly stuff ed and attached to the hat. The fl attened shape of the snout is formed by crocheting into just the back loops of the stitches at the beginning and end rows of the side edges. Buttons are stitched and pulled into the snout to shape it further after stuffi ng the piece. Button eyes, twisted cords and tassels fi nish the hat.
MAIN PIECE
Both sizes
Starting at the top of the hat, with 5mm hook and A, follow the pattern for the leopard hat main piece on page 14.
Earflap facings (make 2)
Omit if you plan to add a crocheted lining.
Both sizes
With 5mm hook and A, follow the earfl ap facing pattern as for the leopard hat on page 18.
Edging
With 4mm hook and A, follow edging pattern for the earfl ap facing on page 18.
EARS (MAKE 2)
Both sizes
Starting at the top of the ear, with 5mm hook and A, make 4 ch and sl st to fi rst ch to form a ring.
Round 1: 1 ch (does not count as a st), work 6 dc into ring, sl st into fi rst dc (6 sts).
Round 2 (inc): 1 ch (does not count as a st), (dc2inc) 6 times, sl st into fi rst dc (12 sts).
Round 3: 1 ch (does not count as a st), work 1 dc in each dc, sl st into fi rst dc.
Round 4 (inc): 1 ch (does not count as a st), (dc2inc, 1 dc) 6 times, sl st into fi rst dc (18 sts).
Round 5 (inc): 1 ch (does not count as a st), (dc2inc, 2 dc) 6 times, sl st into fi rst dc (24 sts).
Round 6 (inc): 1 ch (does not count as a st), (dc2inc, 3 dc) 6 times, sl st into fi rst dc (30 sts).
Adult size only
Next (inc): 1 ch (does not count as a st), (dc2inc, 4 dc) 6 times, sl st into fi rst dc (36 sts).
Both sizes
Next: 1 ch (does not count as a st), work 1 dc in each dc, sl st into fi rst dc.
Rep last round 5[8] more times.
Fasten off , leaving a long length of yarn at the end.
SNOUT
Both sizes
Starting at the centre of the snout, with 5mm hook and A, make 4 ch and sl st to fi rst ch to form a ring.
Round 1: 1 ch (does not count as a st), work 5 dc into ring, sl st into fi rst dc (5 sts).
Round 2 (inc): 1 ch (does not count as a st), (dc2inc) 5 times, sl st into fi rst dc (10 sts).
Round 3 (inc): 1 ch (does not count as a st), (dc2inc, 1 dc) 5 times, sl st into fi rst dc (15 sts).
Round 4 (inc): 1 ch (does not count as a st), (dc2inc, 2 dc) 5 times, sl st into fi rst dc (20 sts).
Round 5 (inc): 1 ch (does not count as a st), (dc2inc, 3 dc) 5 times, sl st into fi rst dc (25 sts).
Adult size only Next (inc): 1 ch (does not count as a st), (dc2inc, 4 dc) 5 times, sl st into fi rst dc (30 sts).
Both sizes
Next: 1 ch (does not count as a st), work 1 dc into the back loop only of each dc, sl st into fi rst dc. This will help to keep the front of the snout fl at. Next: 1 ch (does not count as a st), work 1 dc in each dc, sl st into fi rst dc. Rep last round 1[2] more times.
Next: 1 ch (does not count as a st), work 1 dc into the back loop only of each dc, sl st into fi rst dc. Adult size only
Next (dec): 1 ch (does not count as a st), (dc2dec, 4 dc) 5 times, sl st into fi rst dc (25 sts).
Both sizes
Next (dec): 1 ch (does not count as a st), (dc2dec, 3 dc) 5 times, sl st into first dc (20 sts).
Next (dec): 1 ch (does not count as a st), (dc2dec, 2 dc) 5 times, sl st into fi rst dc (15 sts).
Fasten off , leaving a long length of yarn at the end.

MAKING UP
Edging
With right side of work facing, using 4mm hook and A, rejoin yarn to the back of the hat by the second earfl ap and follow the edging pattern as for the leopard hat on page 23.
Ears
Stuff the ears lightly, keeping a fl attened shape. With the long length of yarn left, sew the 15[18] stitches together from each side of the last round of the ears to join, forming a straight edge. Shape the ears by bringing the two corners to the middle and stitch together to hold in place. Sew the ears to the main section of the hat, stitching all around the lower edges to prevent them from fl opping over.
Snout
Stuff the snout, keeping the front fl at. With the long length of yarn left at the end, run a line of stitches through the last round and pull the yarn to gather the stitches and close the opening before fastening off . Sew the small buttons to the snout, stitching right through to the back of the work and pulling tight on the thread to draw the nostrils in. Attach the snout to the main part of the hat at the centre front, positioning it just above the edging stitches.
Finishing touches
If making a crocheted lining, attach the twisted cords to the hat after inserting the lining. Weave in all yarn ends. Make two twisted cords (see page 154) measuring 8[12]in (20[30]cm) long in A, using 6[8] strands of yarn. Make two tassels (see page 155) measuring 4[5⅛]in (10[13]cm) long in A, and attach each to one end of the cord, then stitch the other end of the cord to the tip of the earfl ap. Place the small black buttons over the larger white buttons and sew in place for the eyes.
LINING
See pages 142–5 for how to make and attach a cosy fleece or crocheted lining.