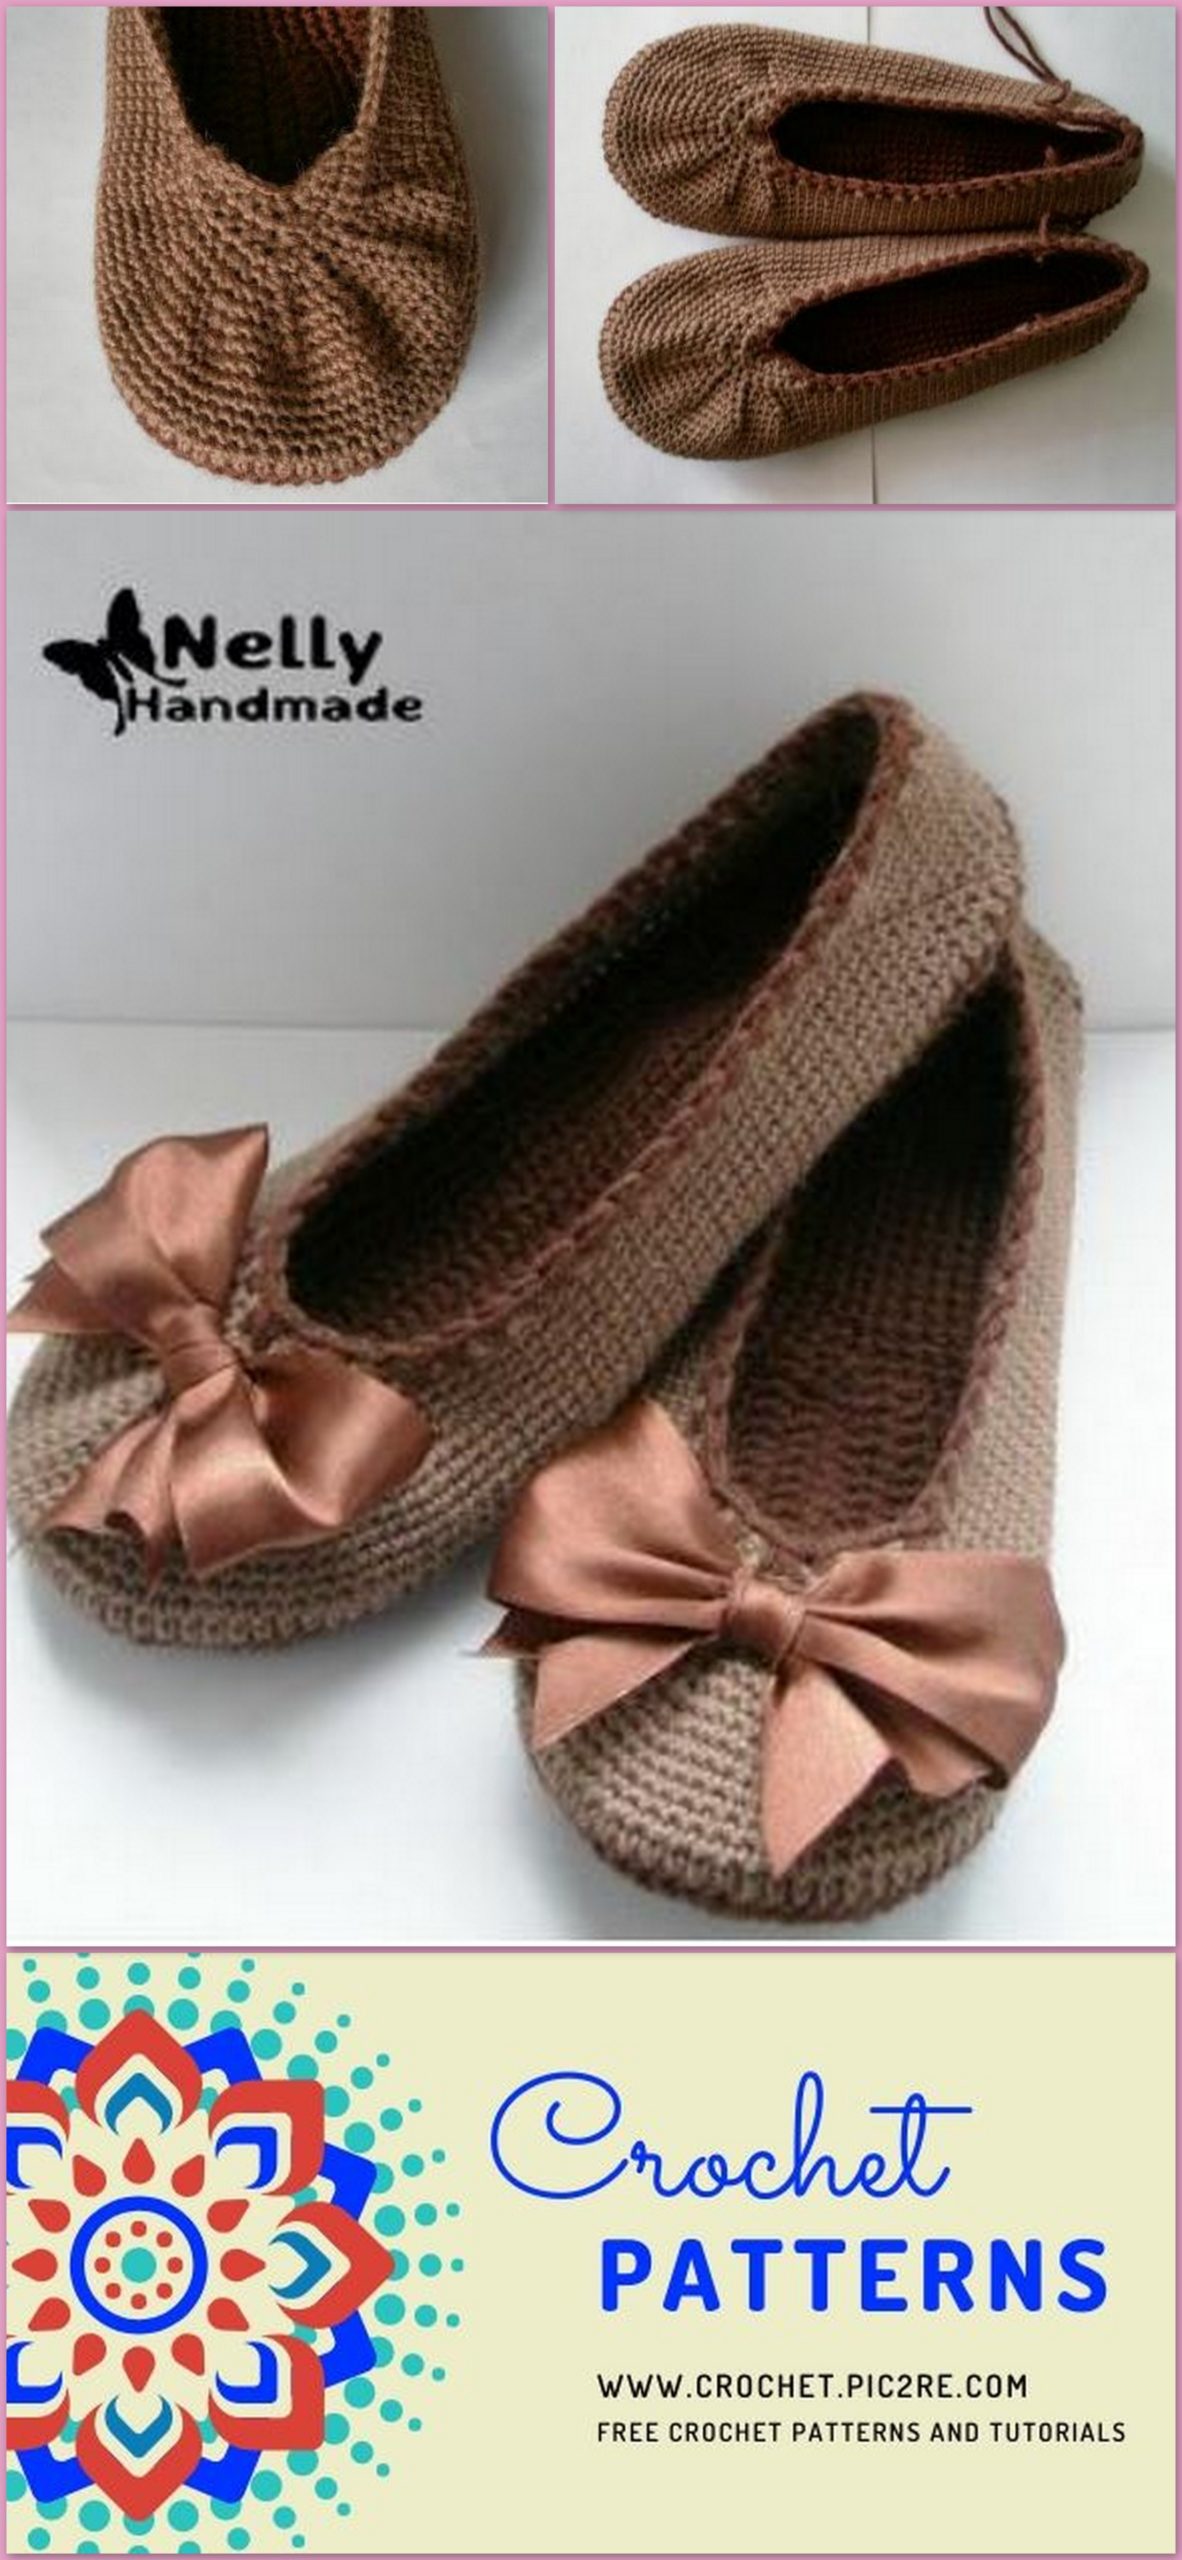
Crocheted Ballerina Slippers Free Pattern
Design: Nelly Shisterova
You will need:
Materials: Yarn: Wool blend. For the sole, choose a slightly heavier yarn weight than for the upper part. For the pictured slippers, ALIZE Lanagold 100g/240m (3.5 oz / 262.5 yds) was used for the sole, and YarnArt Merino De Luxe/50 100 g/280 m (3.5 oz / 306 yds) for the upper part.
Tools: Crochet hook appropriate for yarn weight used. For the pictured slippers, the sole was crocheted with a 3 mm hook (US betw. C and D), the upper part with a 2.1 mm hook (slightly smaller than US B).
Notions: Optional: Taffeta ribbon, 5 mm (2 in) wide, for bows, or any other type of decoration, such as crocheted flowers or pompoms.
Abbreviations:
sc (US term) single crochet
hdc (US term) half double crochet
dc (US term) double crochet
inc – increase: work 2 sts into the same stitch (1 base, 2 upper parts)
dec – decrease: work off 2 sts together (2 bases, one upper part)
Now, let’s get to work!
I admit – I don’t count every single stitch. I do count the initial stitch number and keep track of how many increases or decreases I’ve worked in each Round.
SOLE
Round 1. Chain 40.
Round 2. Into the second chain from the hook, work 2sc, then 19sc, 1hdc, 17dc, into the last chain, work 5dc. Continue to work mirror-inverted along the other side of the chain into the unused loops of the chains: 17 dc, 1hdc, 20 sc, join to the begin of the round with a slip stitch.
Round 3. chain 1 up, 2 inc, continue to work sc above sc’s, hdc above hdc’s, and dc above dc’s, i.e. repeat all the sts from the last Round in the same places, except for at the turns, work inc: around the toe, work 5 increases, and around the heel, 3 inc.
Rounds 4–6. Chain 1 up, then work sc’s for the whole round, continuing to work your 5 increases (above the increases from the previous row) around the toe, and 3 increases around the heel.
Round 7. Work as established, only this time, work dc’s only, continue to work your 5 increases (above the increases from the previous row) around the toe and 3 inc around the heel.
You will need to make either 2 or 4 of these soles, just as you like. I always make 4 – as my Dad says, when it comes to footwear – the higher above the ground, the better! Even though we don’t
plan on wearing them outdoors, a doubled-up sole is always warmer =)
UPPER PART
Round 1. Place two soles on top of each other, wrong sides facing each other and right sides facing outwards, then crochet them together along the outer edge, starting at the heel.
Rounds 2–7. Work in sc for 6 rounds. I recommend working in spiral rounds instead of joined rounds with chain-up, to avoid a visible joining line where begin and end of the round meet: At the end of the round, omit the slip stitch for joining, but continue working in sc instead, directly into the new round.
Round 8. Begin to shape the toe section. In this round, work 5 decreases at the toe. For this, find the middle around the toe and from this middle, count 14 sts backwards – in this spot, place the first decrease, now 5sc and again place a decrease, repeat this section, until you have worked 5 decreases in all. Continue on to the end of the round in sc.
Round 9. In this round, we need to work 7 decreases. Work sc to the toe section, then around the toe from the first previous-round decrease, count back 6 sts, work a decrease here, now 4 sc and make another decrease, repeat this section, until you’ve worked 7 decreases for this round.
Round 10. Work this round in sc, continuing to decrease as established around the toe, in this round, every 3 sc’s. In other words, decrease on top of previous-round decreases.
Round 11. Work this round in sc, continuing to decrease as established around the toe, in this round, every 2 sc’s. In other words, decrease on top of previous-round decreases.
Round 12. Work this round in sc, continuing to decrease as established around the toe, in this round, every 1 sc. After having worked the last one, make a decrease and two more sc’s. ATTENTION!

Turn work and work back in the other direction – this is a short row to create additional toe room.
The result is supposed to turn out like this:
In all, work 4 of these short rows (back and forth with turning over the toe area), at the same time working a decrease in the middle of every row. To finish, work a complete round over all sts again, and at the heel, work [2 sc, dec] 3 times in all to prevent the slipper from slipping off your foot.
Finishing
Finish off by crocheting around the upper edge of the slipper to hide any rough spots at the toe and also to add a more sophisticated look. For this, take up the darker colored yarn (as used for the sole) again and crochet around the upper edge of the slipper. I prefer to crochet not into the very last round worked, but rather into the next-to last one, to make the sts look bigger, and also not into every single stitch, but only in every other one, to further constrict the edging for a more secure fit.
All that remains to do now is hiding the ends, to prevent unraveling – after all, it‘s footwear! – and adding some decoration in the form of a bow or flower.
I made the bow in the fork technique depicted, only I didn’t have a fork that large, so I had to ask my beloved one to spread two of his precious fingers and “serve as fork for a short while”=)))