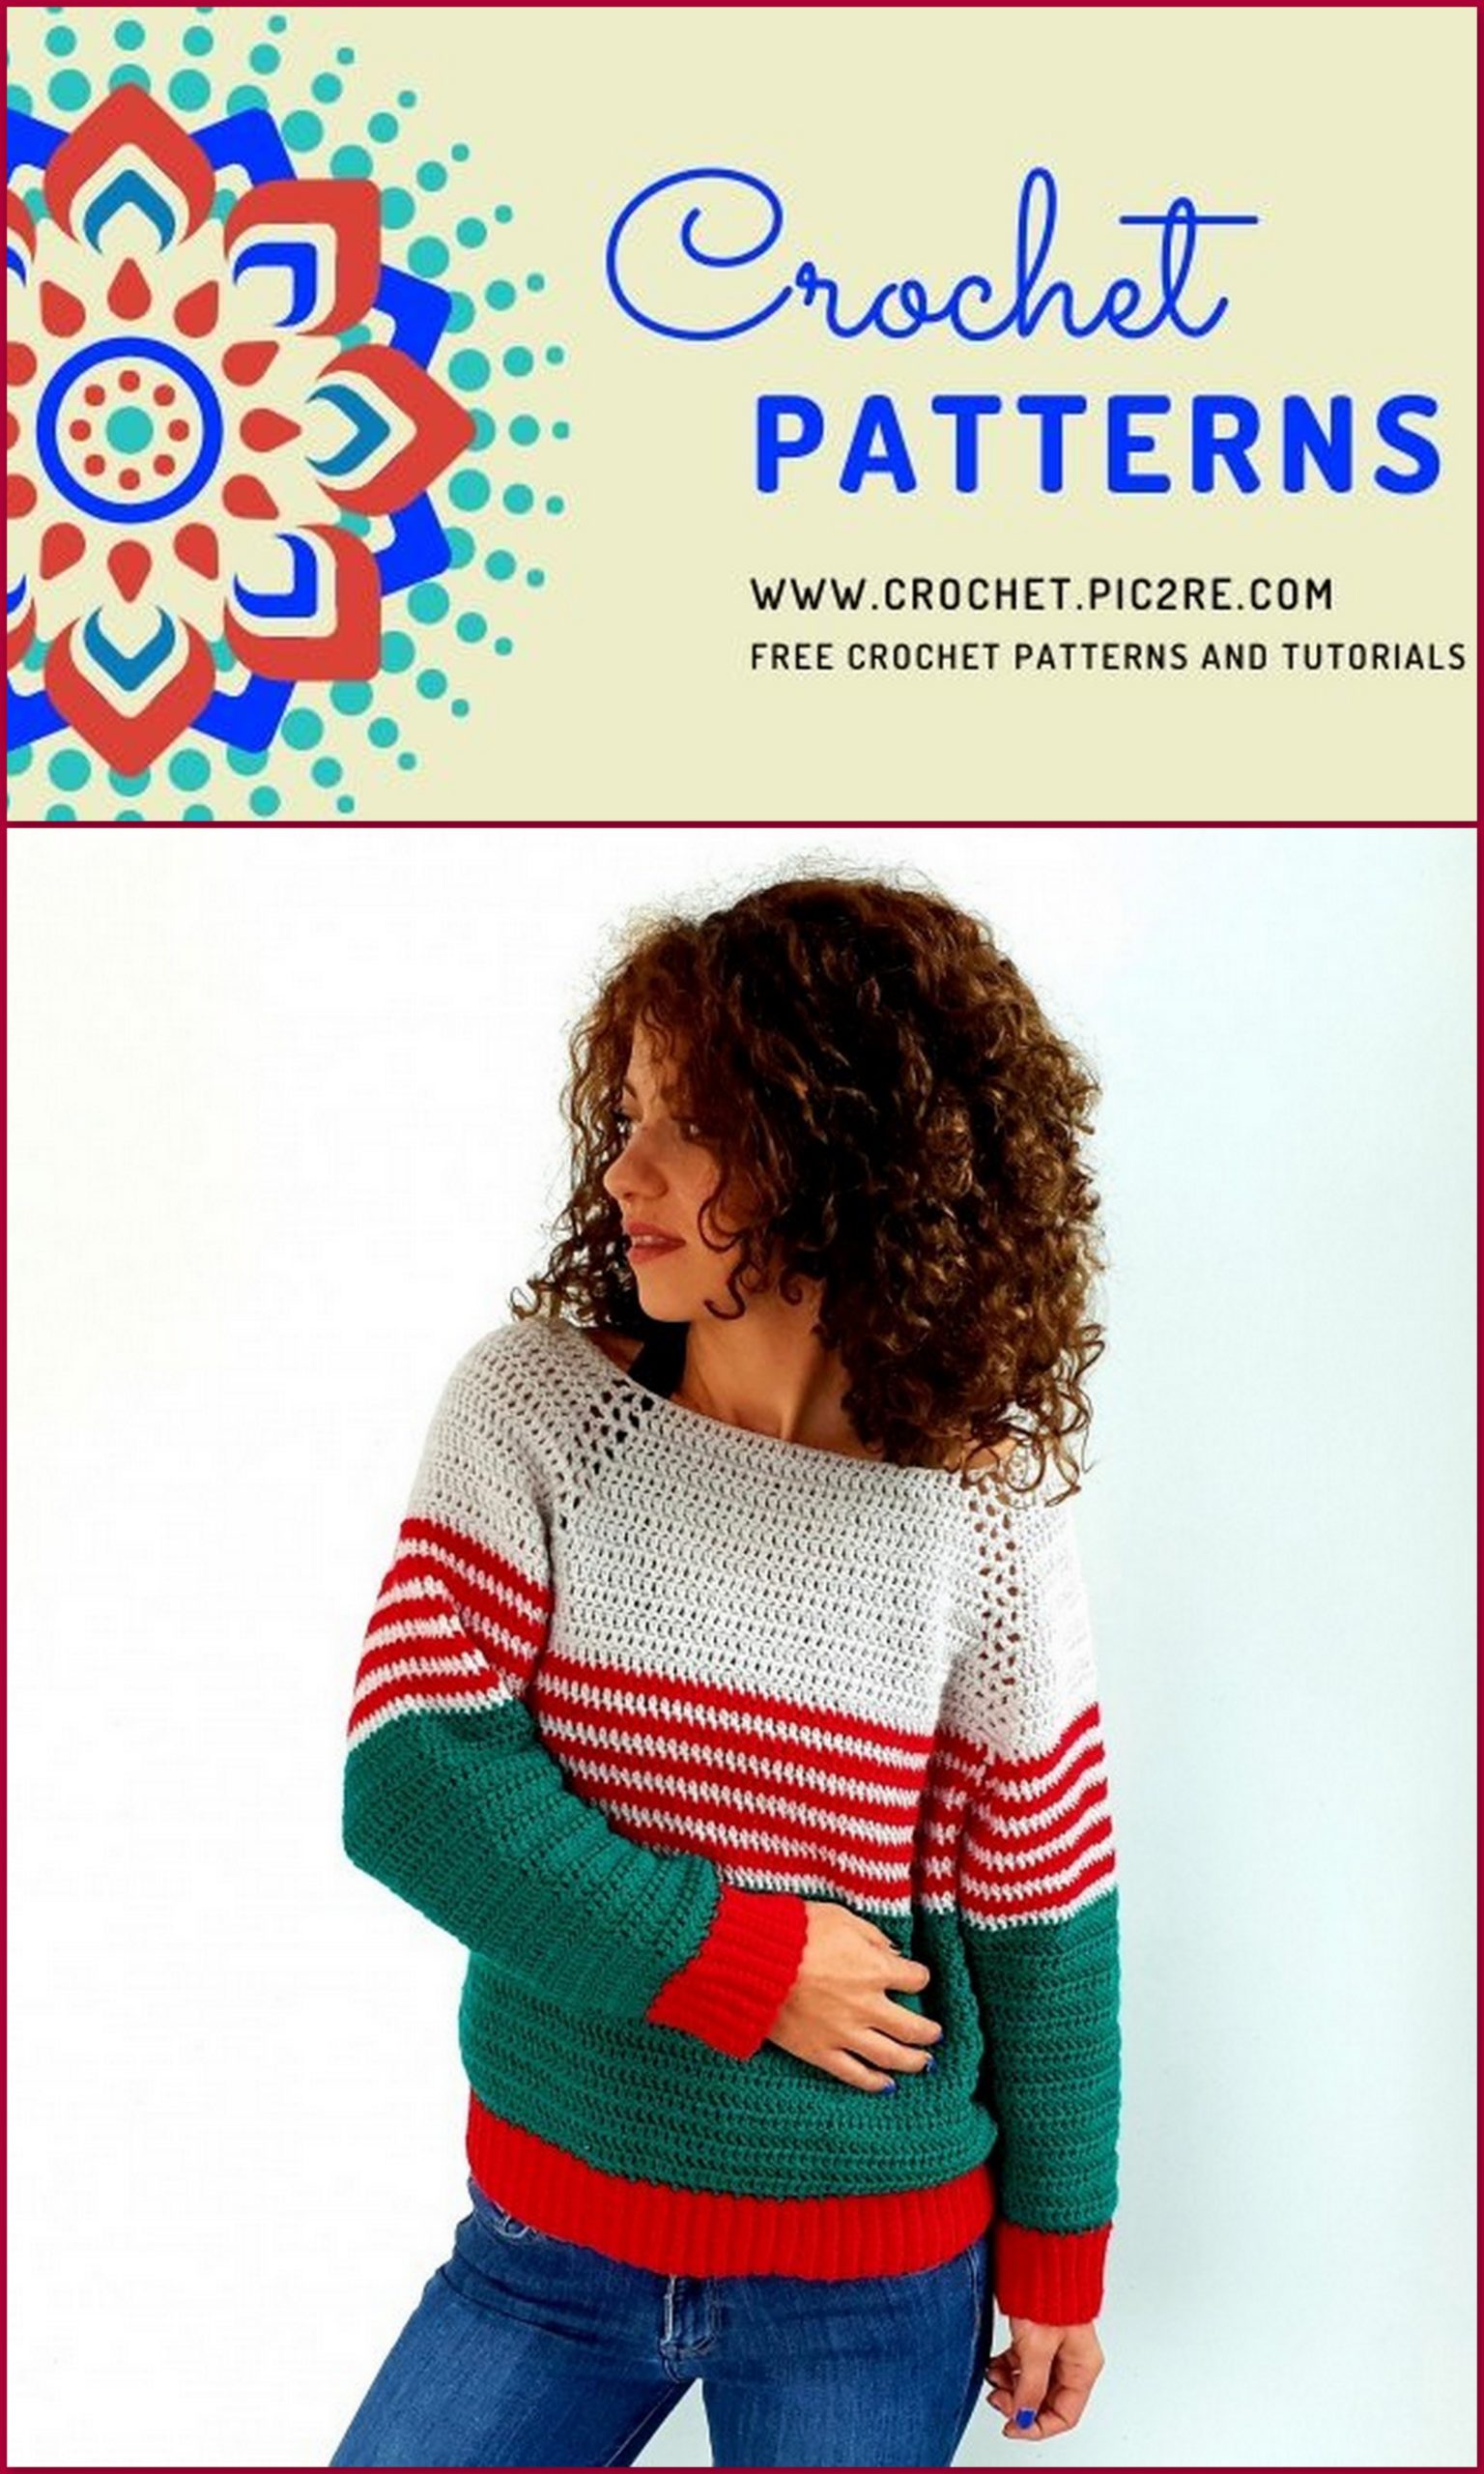
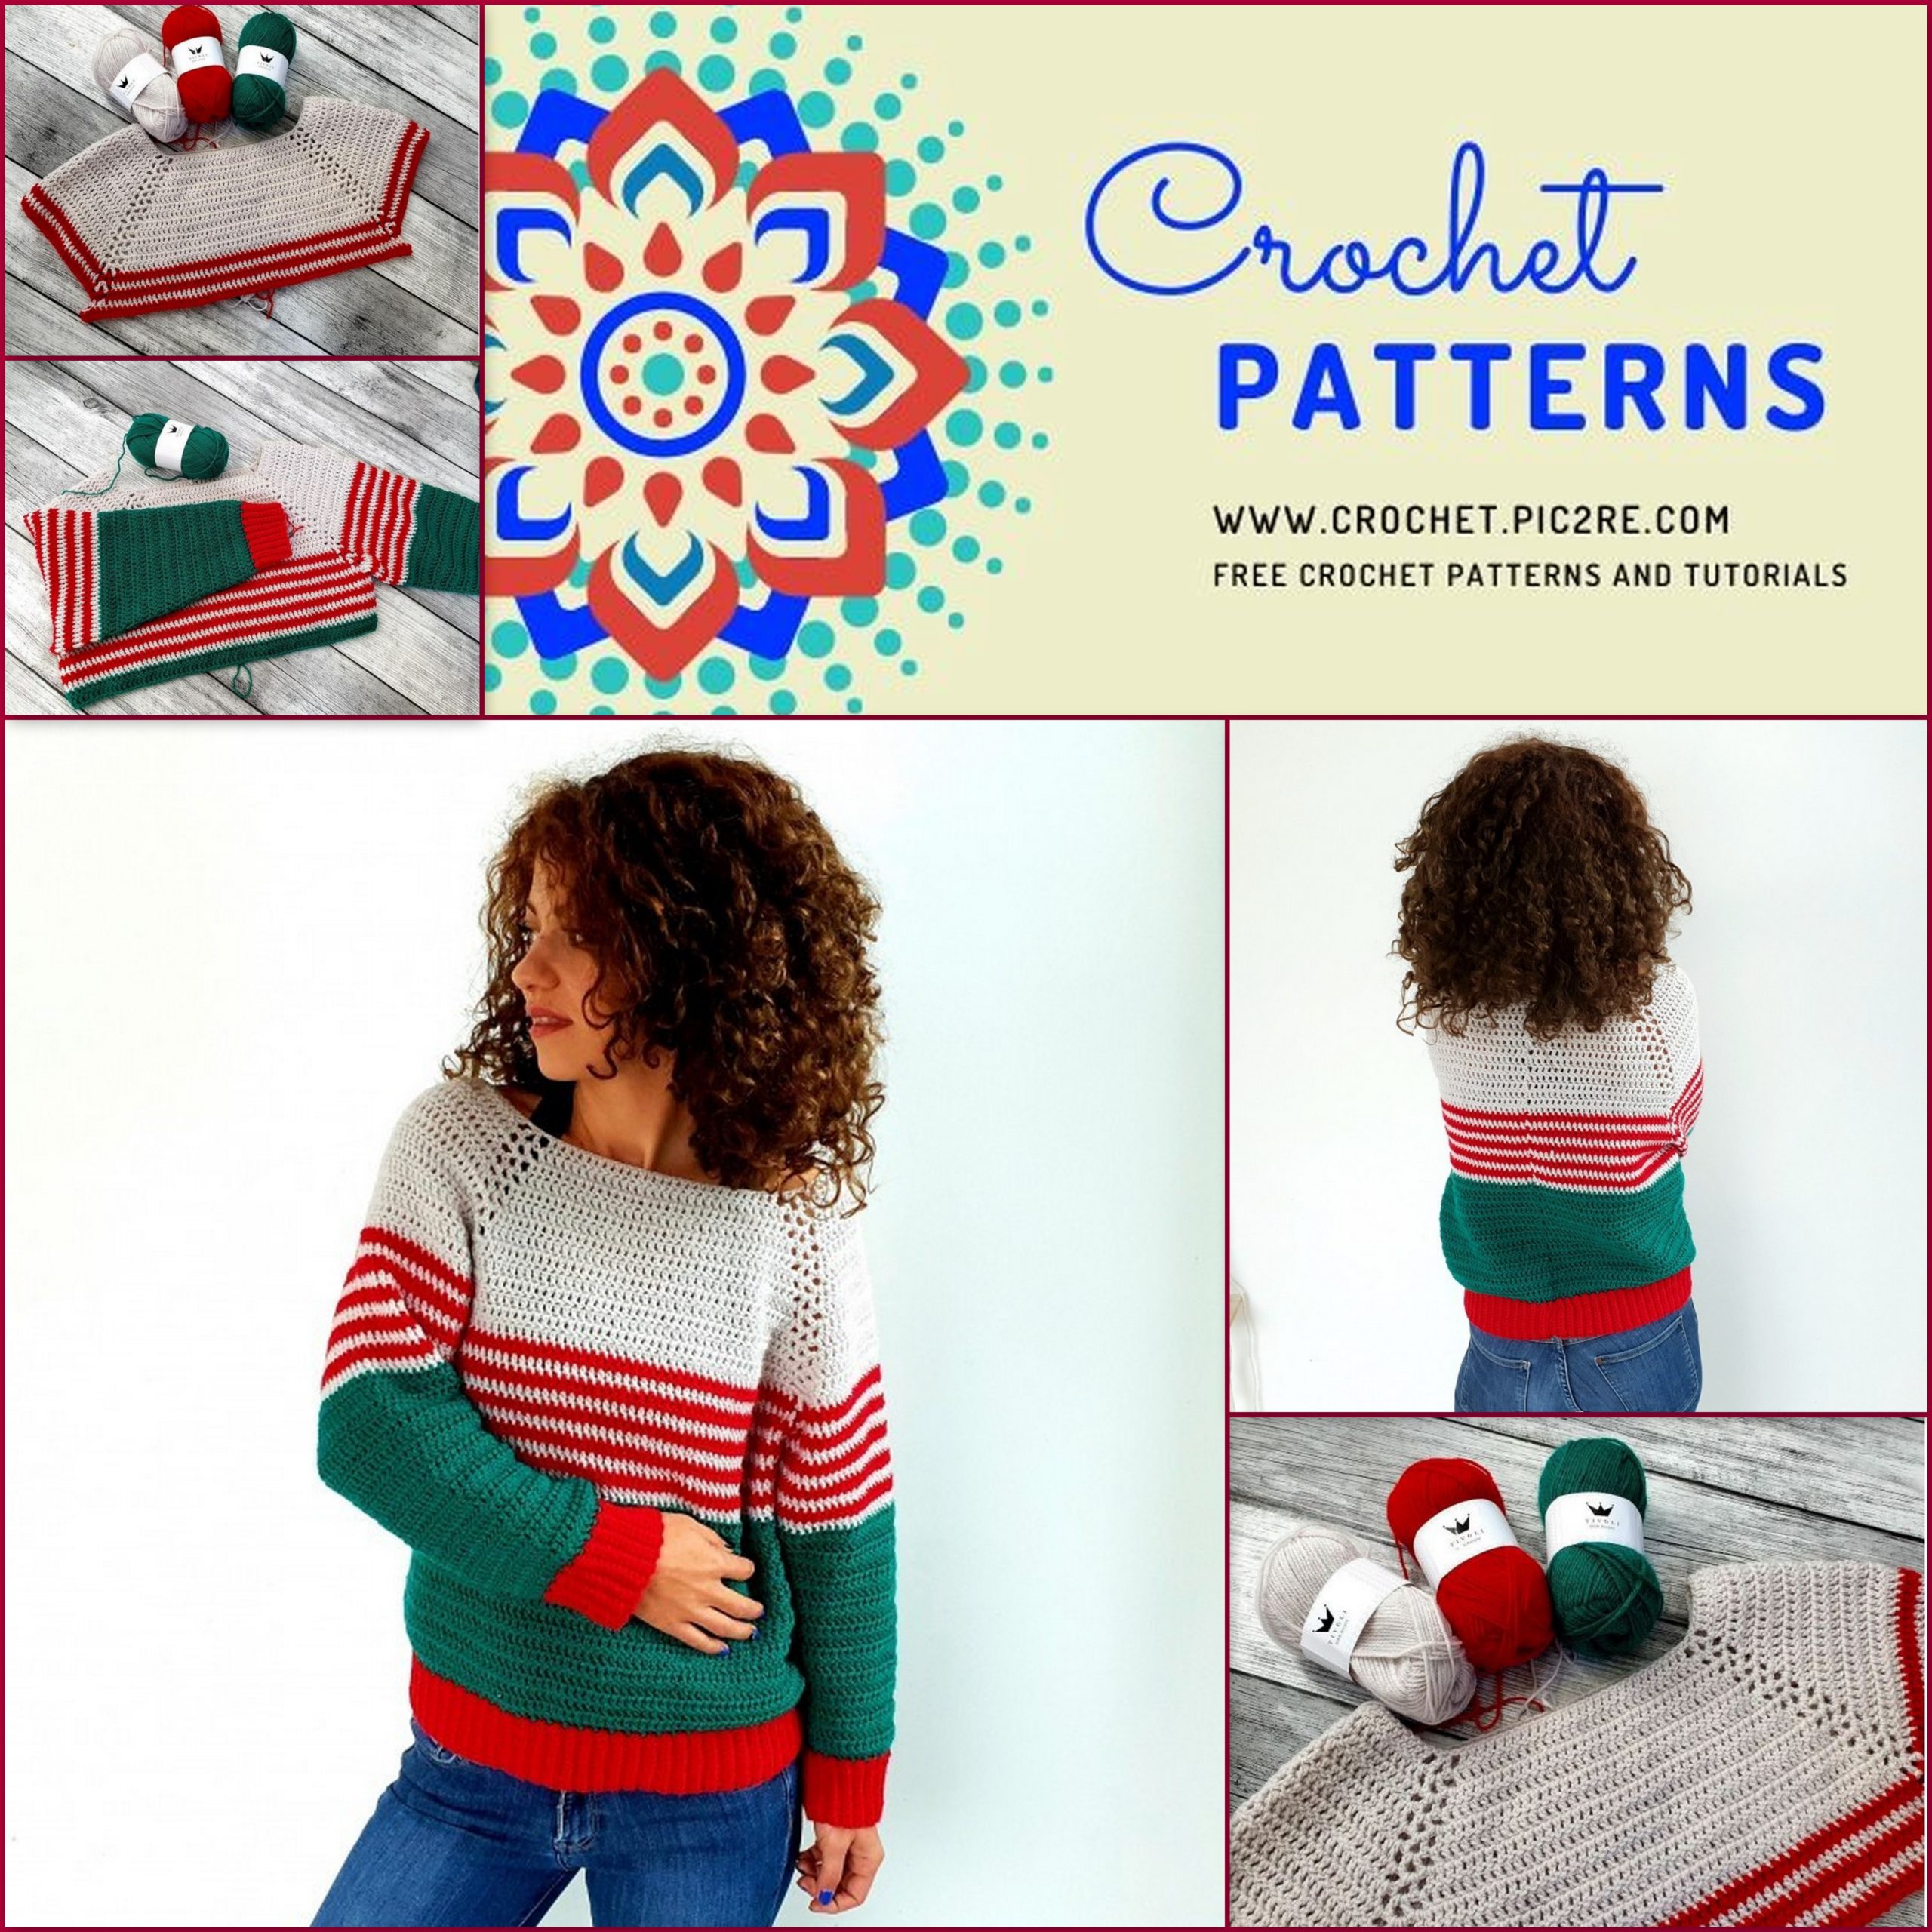
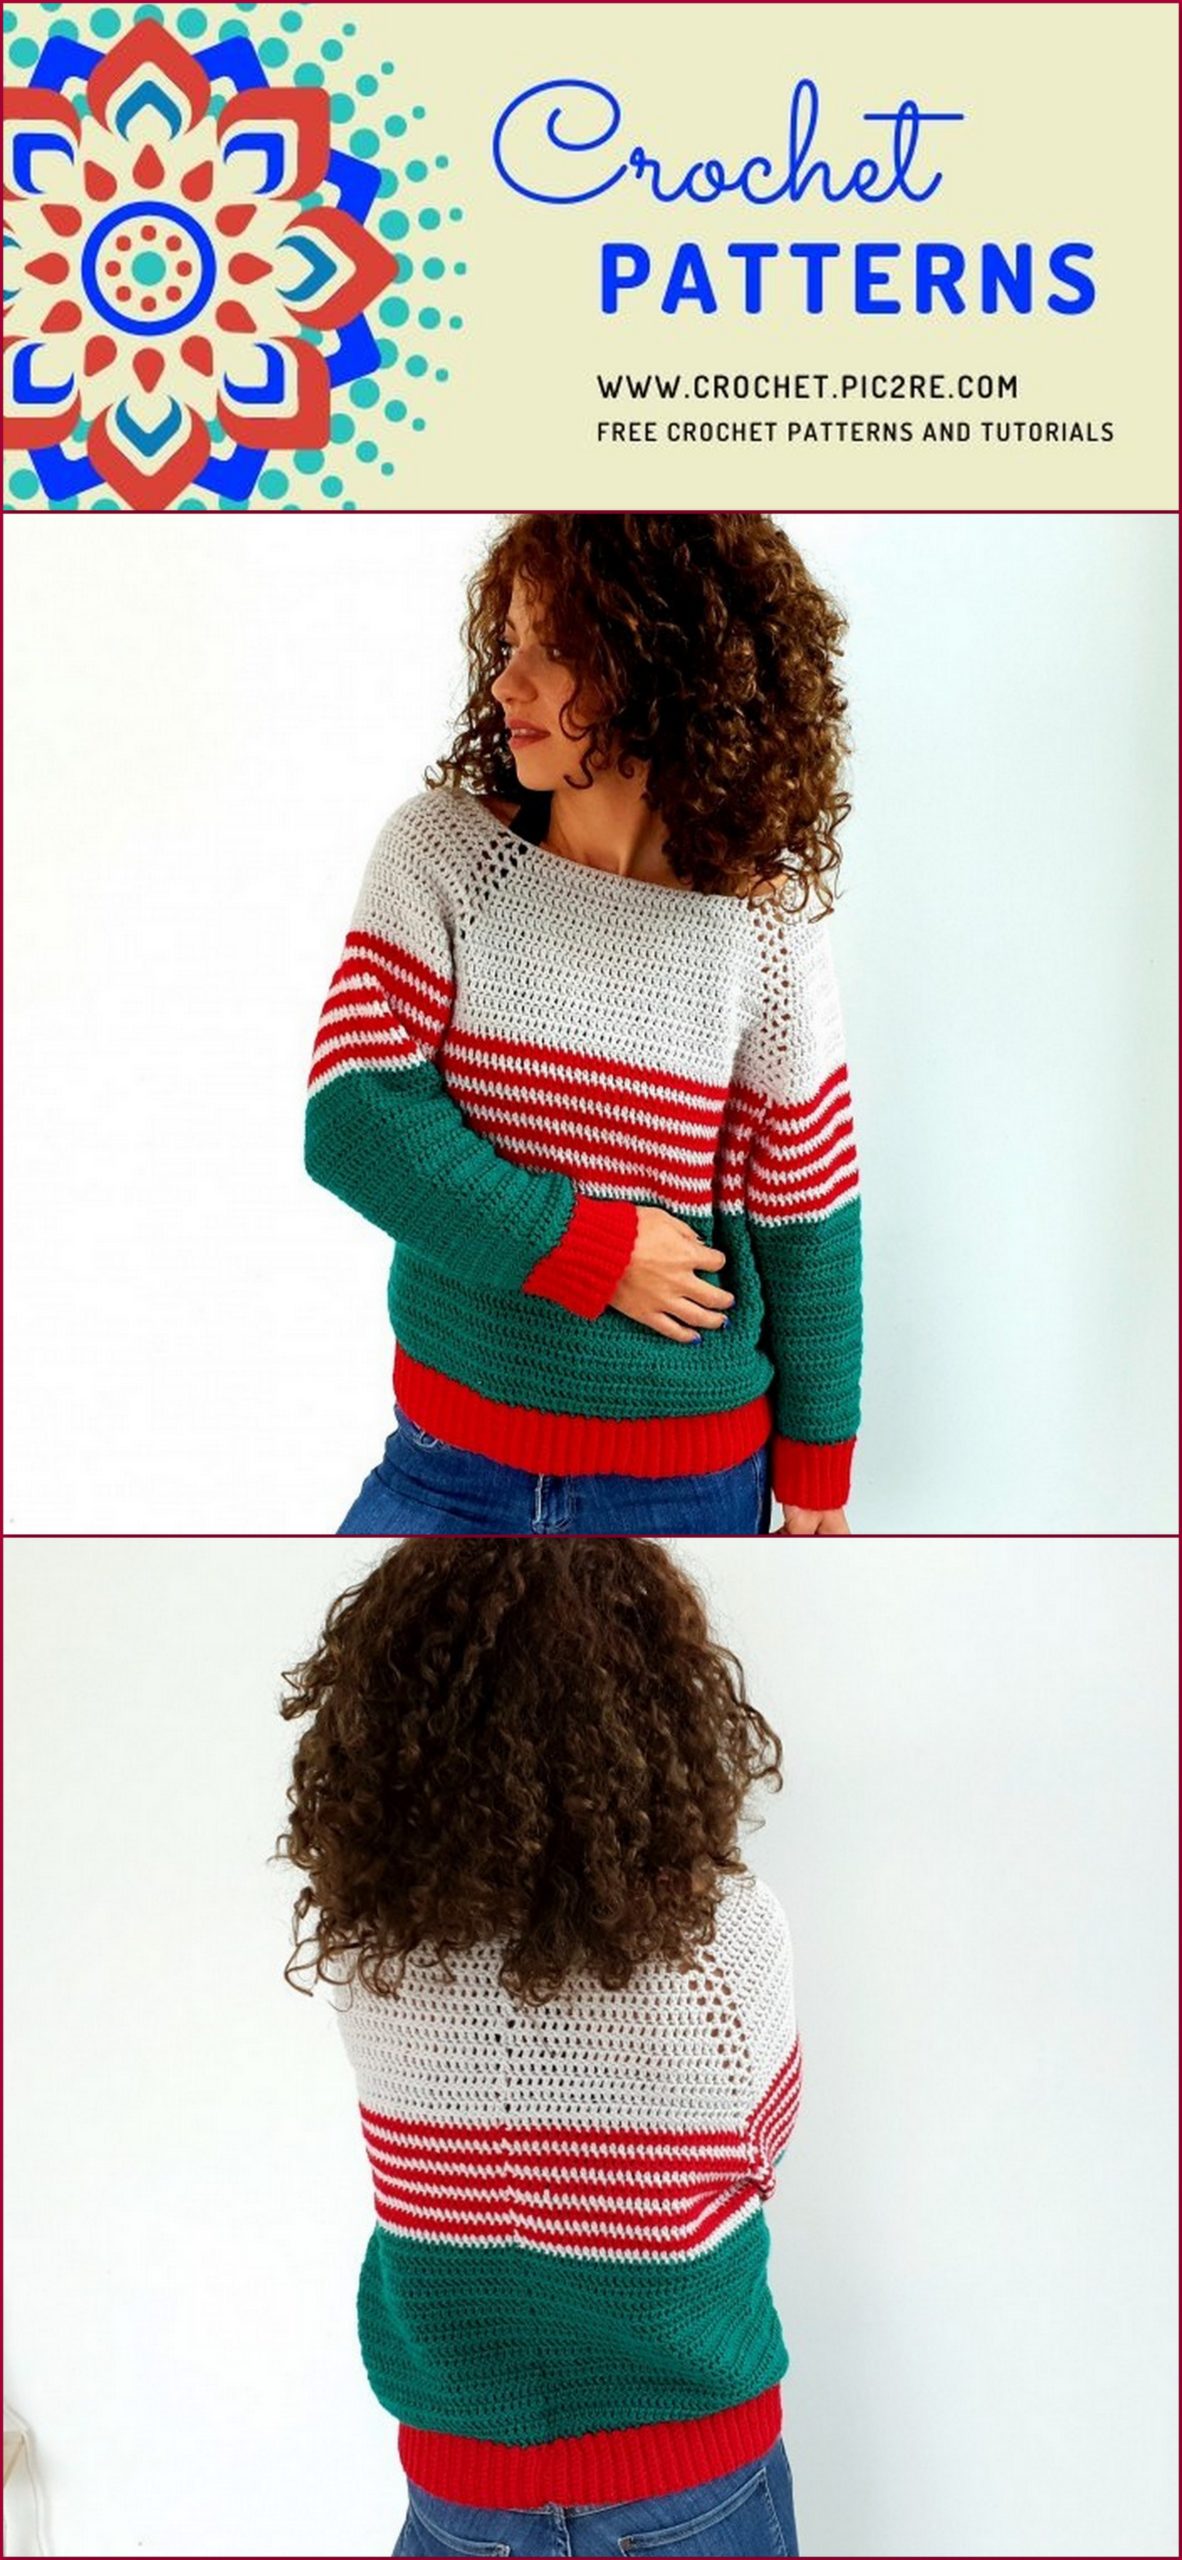
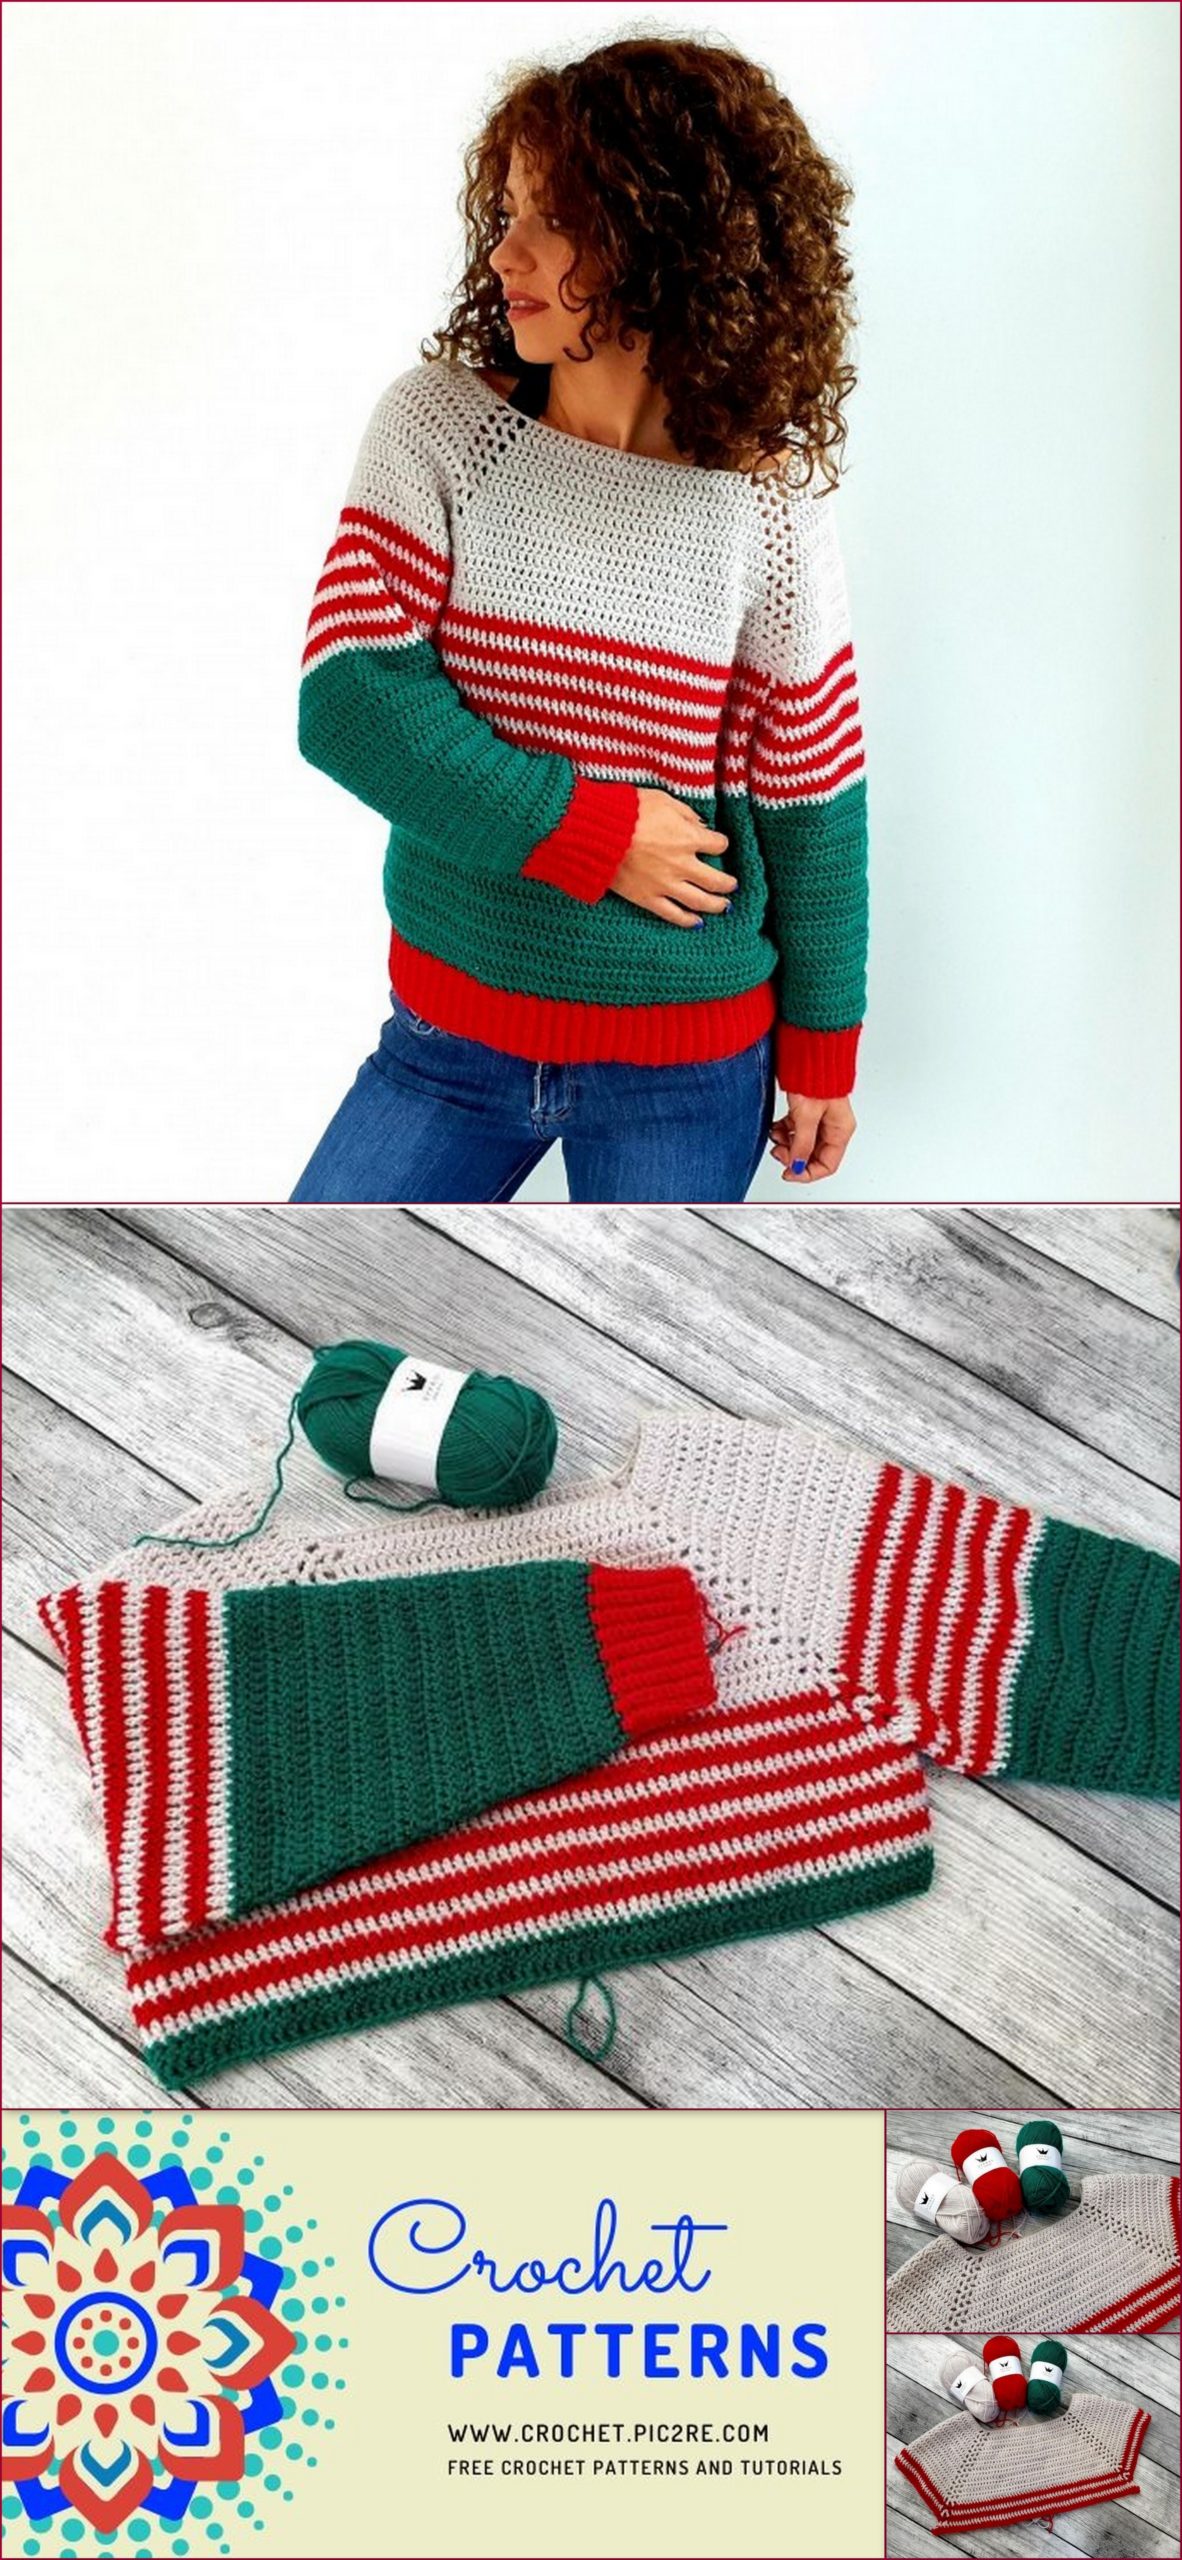
Crochet Santa’s Helper Sweater Free Pattern
No. 1006-194-6162
Skill level: Beginner
Sizes: S, M, L, XL.
Crochet hook: 4 mm (US size G)
Materials: Yarn needle & markers
Yarn: Hobbii Tivoli in colors:
Cool Light Grey (14), X-Mas Red (63),
Emerald Green (55)
How much yarn do I need?
S = 3 x grey, 3 x emerald, 2 x red
M = 3 x grey, 4 x emerald, 2 x red
L = 3 x grey, 4 x emerald, 2 x red
XL = 4 x grey, 4 x emerald, 2 x red
Buy the yarn here:
Abbreviations used in this pattern:
● Ch = chain
● Dc = Double crochet
● Scblo = single crochet worked in back loop only
● St(s) = stitch(es)
● Sl st = slip stitch
● Inc = Increase (1 dc, ch 2, 1 dc in the same st/space)
● Dec = Decrease (2 dc worked together)
You can find a video tutorials on how to make a decrease here:
Gauge:
● 14 dc = 10 cm (4”)
● 9 rows = 10 cm (4”)
Pattern notes:
● The sweater is worked in rounds, joining with a sl st after each round. We will work on
the right and wrong side, so turn your work after each round.
● The Ch 2 at the beginning of the round doesn’t count as a first dc.
● When changing color at the end of the row, make a slip stitch with the next color.
● Before increasing in the corners, we will create windows by ch 1 and skipping 1 st.
About the design
This Santa’s Helper Sweater is a classic Raglan Sweater, worked in basic stitches, but using some color work to make it more special. It’s a top – down sweater worked with the raglan technique.
We will start with the yoke, then separate the body from the sleeves and work the 3 parts individually. The sweater has a loose fit with a positive ease of 14 cm.
Final measurements
The final measurements are listed in the diagrams below. This will help you choose which size to make according to your own measurements.
In cm Small Medium Large X-Large
Pattern
Yoke
We will start with the foundation chain using grey.
● S = 104 sts
● M = 112 sts
● L = 118 sts
● XL = 136 sts
Join the ends to make a circle.
*The figures for sizes Medium, Large and X-Large are written between brackets.
*The Ch 2 at the beginning of the round doesn’t count as a first dc.
Round 1
Ch 2, 1 dc in the same st, 1 dc in next 13 (15, 16, 19) sts, ch 1, skip 1, 1 inc in next, ch 1, skip 1, 1 dc in next 18 (18, 18, 22) sts, ch 1, skip 1, 1 inc in next, ch 1, skip 1, 1 dc in next 28 (32, 35, 40) sts, ch 1, skip 1, 1 inc in next, ch 1, skip 1, 1 dc in next 18 (18, 18, 22) sts, ch 1, skip 1, 1 inc in next, ch 1, skip 1, 1 dc in each st to the end of the round. Join with a sl st in first dc. Ch 2 and turn.
After finishing the first round, put a stitch marker in each corner to mark where the increases go.
Round 2
1 dc in each st until you reach the last st before the st marker, ch 1 skip 1, 1 inc in the ch 2 space, ch 1 skip 1.
Repeat the steps above to each section of the sweater (back, front, sleeve) to the end of the round. Join with a sl st in 1 st dc. Ch 2 and turn.
Repeat, this round until you have in total:
S = 14 rounds
M = 15 rounds
L = 17 rounds
XL = 18 rounds
Next, we will start alternating colors, making 1 round in red and 1 round in grey.
Round 15 (16, 18, 19)
Repeat round 2 with red. Change to grey at the end of the round when you are making the sl st.
Continue alternating 1 round of red and 1 round of grey until you have in total for the yoke:
S = 17 rounds
M = 18 rounds
L = 20 rounds
XL = 21 rounds
Now that we have finished the yoke, is time to separate the sleeves, from the body and start working the 3 parts individually.

Body
Separating round:
We will continue for a few more rounds, repeating the same color pattern, alternating between red and grey.
Start the round as before, with the specific color, and make 1 dc in each st until you get to the corner (the ch 2 space), make 1 dc in the corner, ch 6 (7, 7, 7), skip the sts for the sleeve and
move forward to the next corner, make one dc in the corner and continue with 1 dc in each st, until you get to the next corner. Repeat the same with the second sleeve and make 1 dc in each st to the end of the round. Sl st to join with the first dc. Chain 2 and turn.
Round 1
1 dc in each st around, including the underarm chain, to the end of the round. Sl st to join with first dc. Ch 2 and turn.
We will continue altern ating between 1 round of red and 1 round of grey for another:
S = 5 rounds
M = 6 rounds
L = 6 rounds
XL = 5 rounds
Just be aware that the last round has to be in grey.
Next, we will change to emerald green and continue working the body until reaching the desired length or until we have in total 25 rounds.
Brim
After finishing the rounds with emerald green we will make the brim at the bottom. Switch to red and ch 11. Make sure you are working on the right side of the sweater
Row 1
Chain 10 + 1, 1 sc in each of the 10 sts of the chain, sl st in next 2 sts of the bottom and turn.
Row 2
1 scblo in each of the 10 sts, ch 1 and turn.
Row 3
1 scblo in each of the 10 sts, sl st in the next 2 sts of the bottom.
Repeat rows 2 and 3 until you finish the entire circumference of the hoodie. At the end join the ends with sl sts.
Sleeves
For the sleeves we will follow the same color pattern as for the body.
Round 1
Insert the yarn in the middle st of the underarm chain, ch 2, 1 dc in the same st. Continue with 1 dc in each st around. Join with a sl st in first dc. Ch 2 and turn.
Round 2
Ch 2, 1 dec, 1 dc in each st until you have 2 sts left, 1 dec in the last 2 sts. Join with a sl st in first dc.
Round 3
Ch 2, 1 dc in the same st, 1 dc in each st around.
Repeat rounds 2 and 3 until you have in total 26 rounds for the sleeve. If you want a longer sleeve you can add a few more rounds without decreasing. If you need a smaller cuff you can continue with decreases as well.
After finishing the length of the sleeve, add the brim following the same pattern as for the bottom
of the sweater. Weave in all ends and done!
Your Santa’s Helper Sweater is ready to be worn or to take place under the Christmas tree.