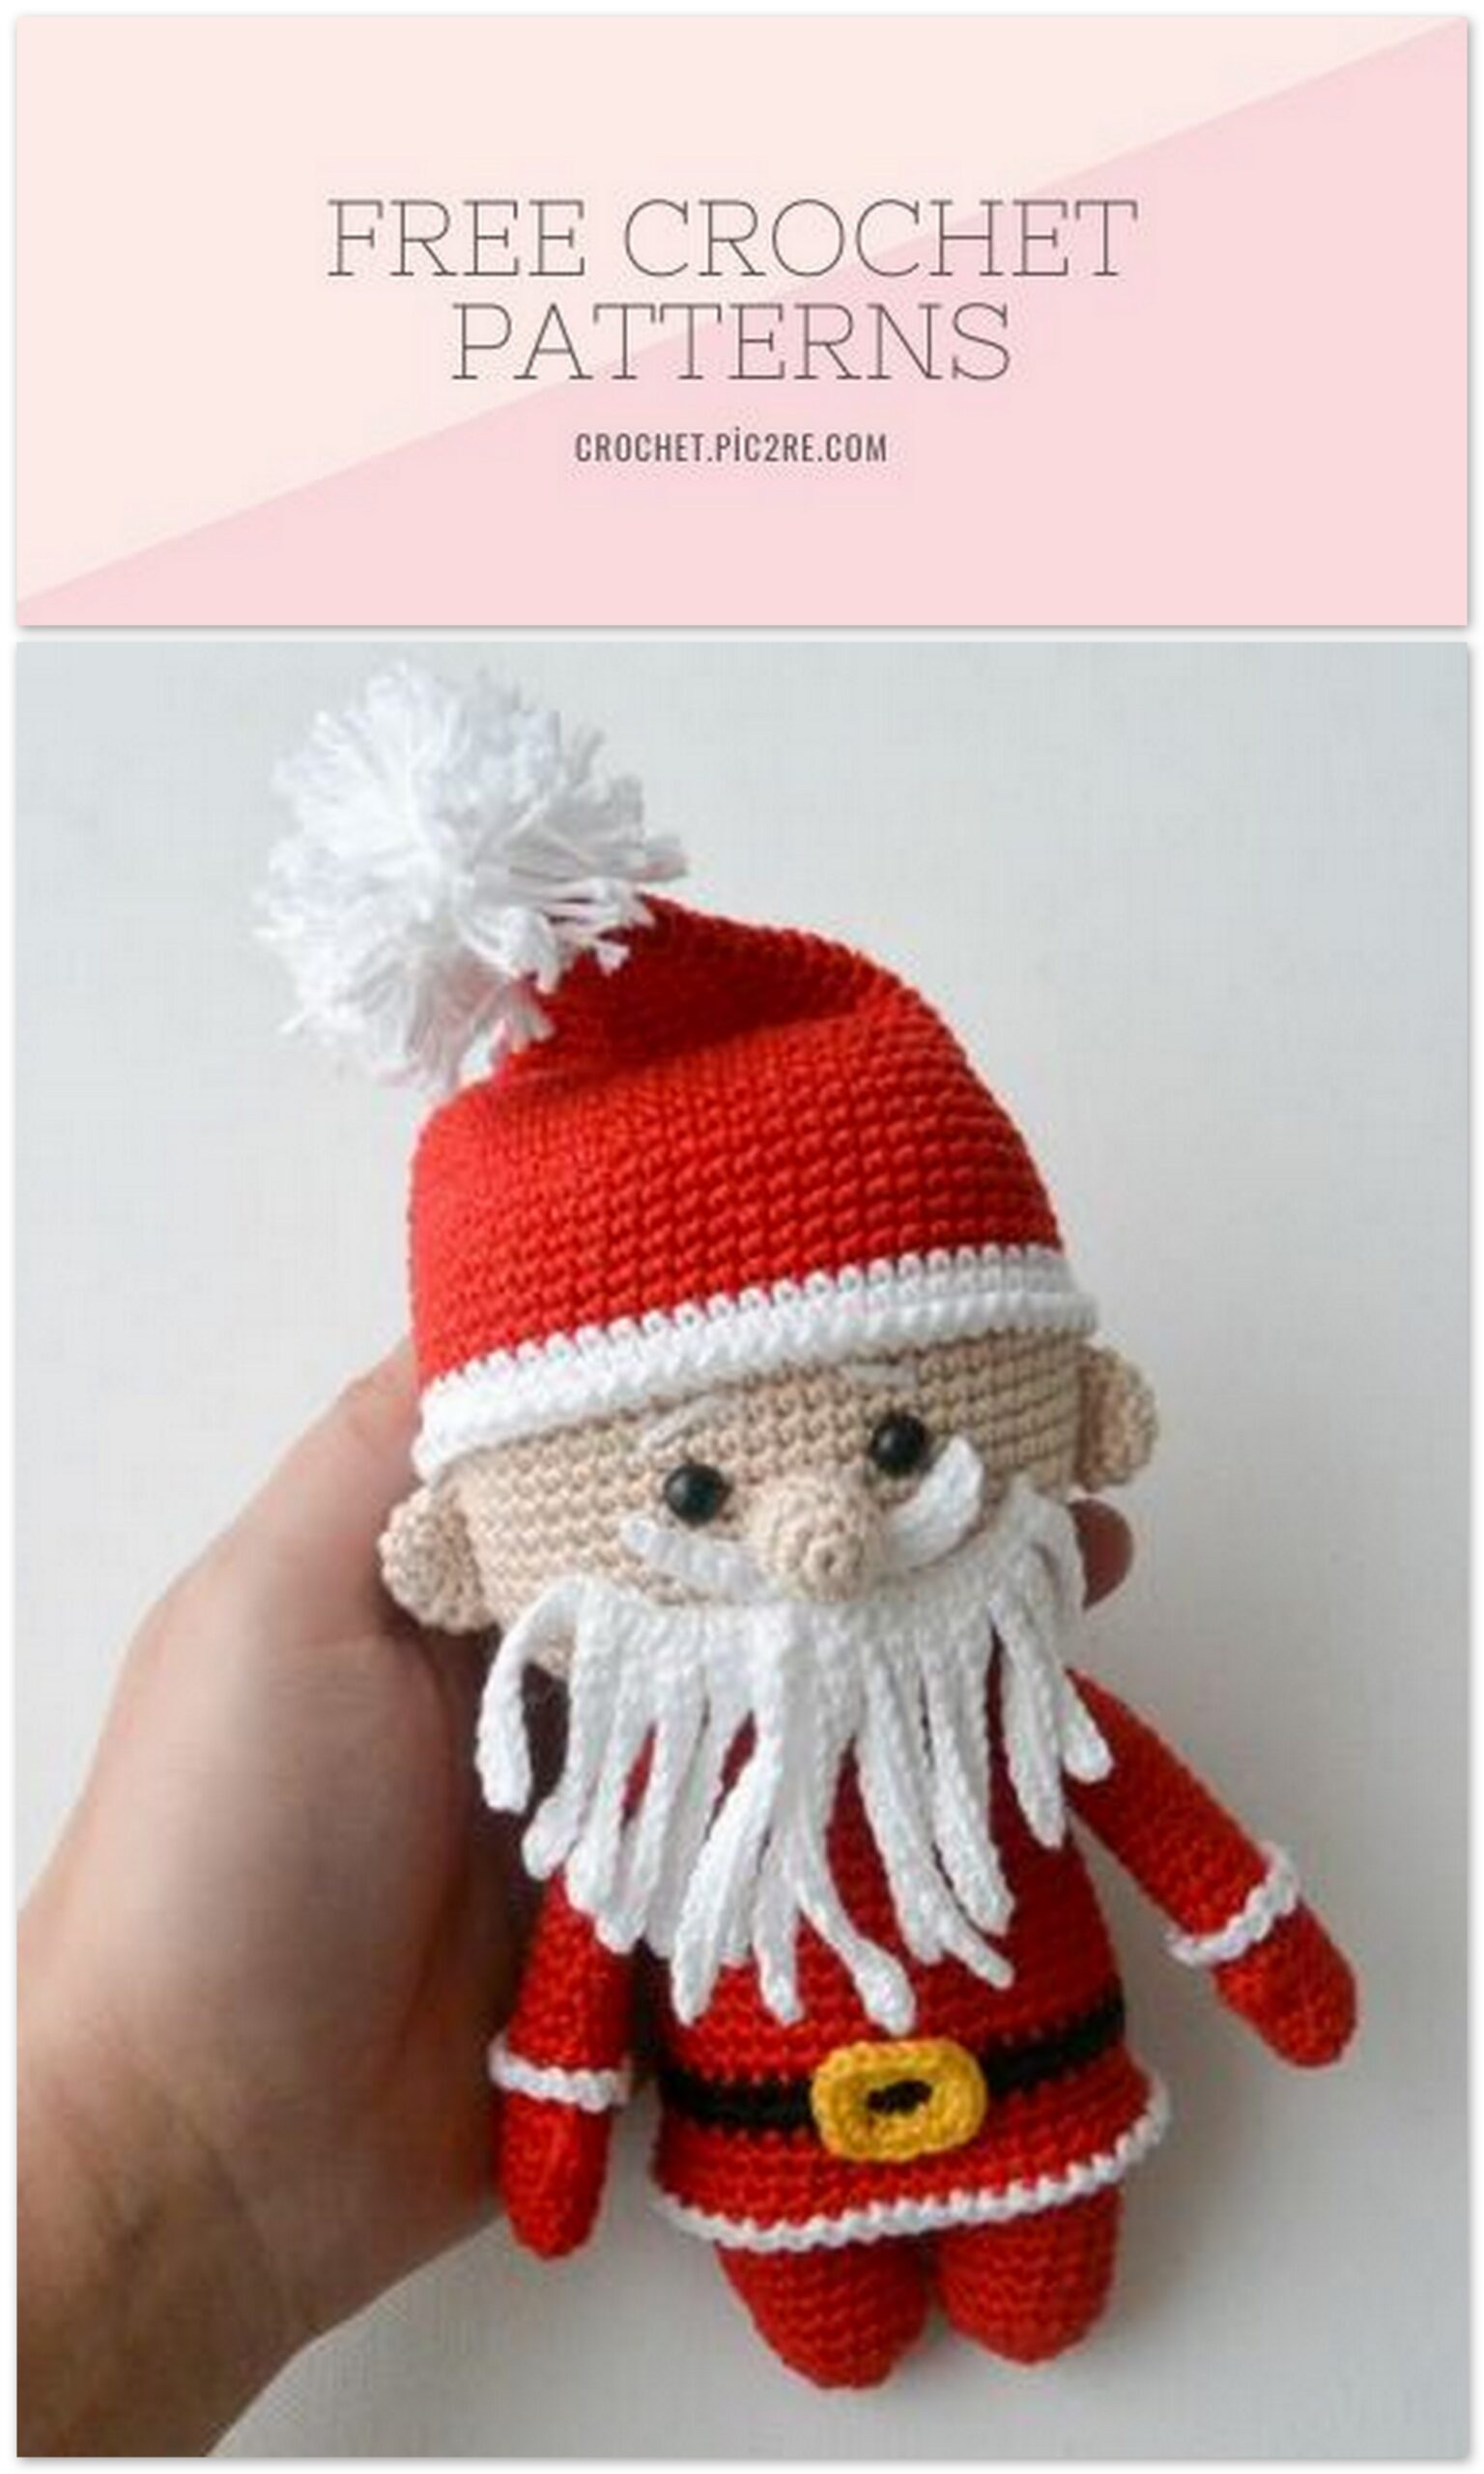
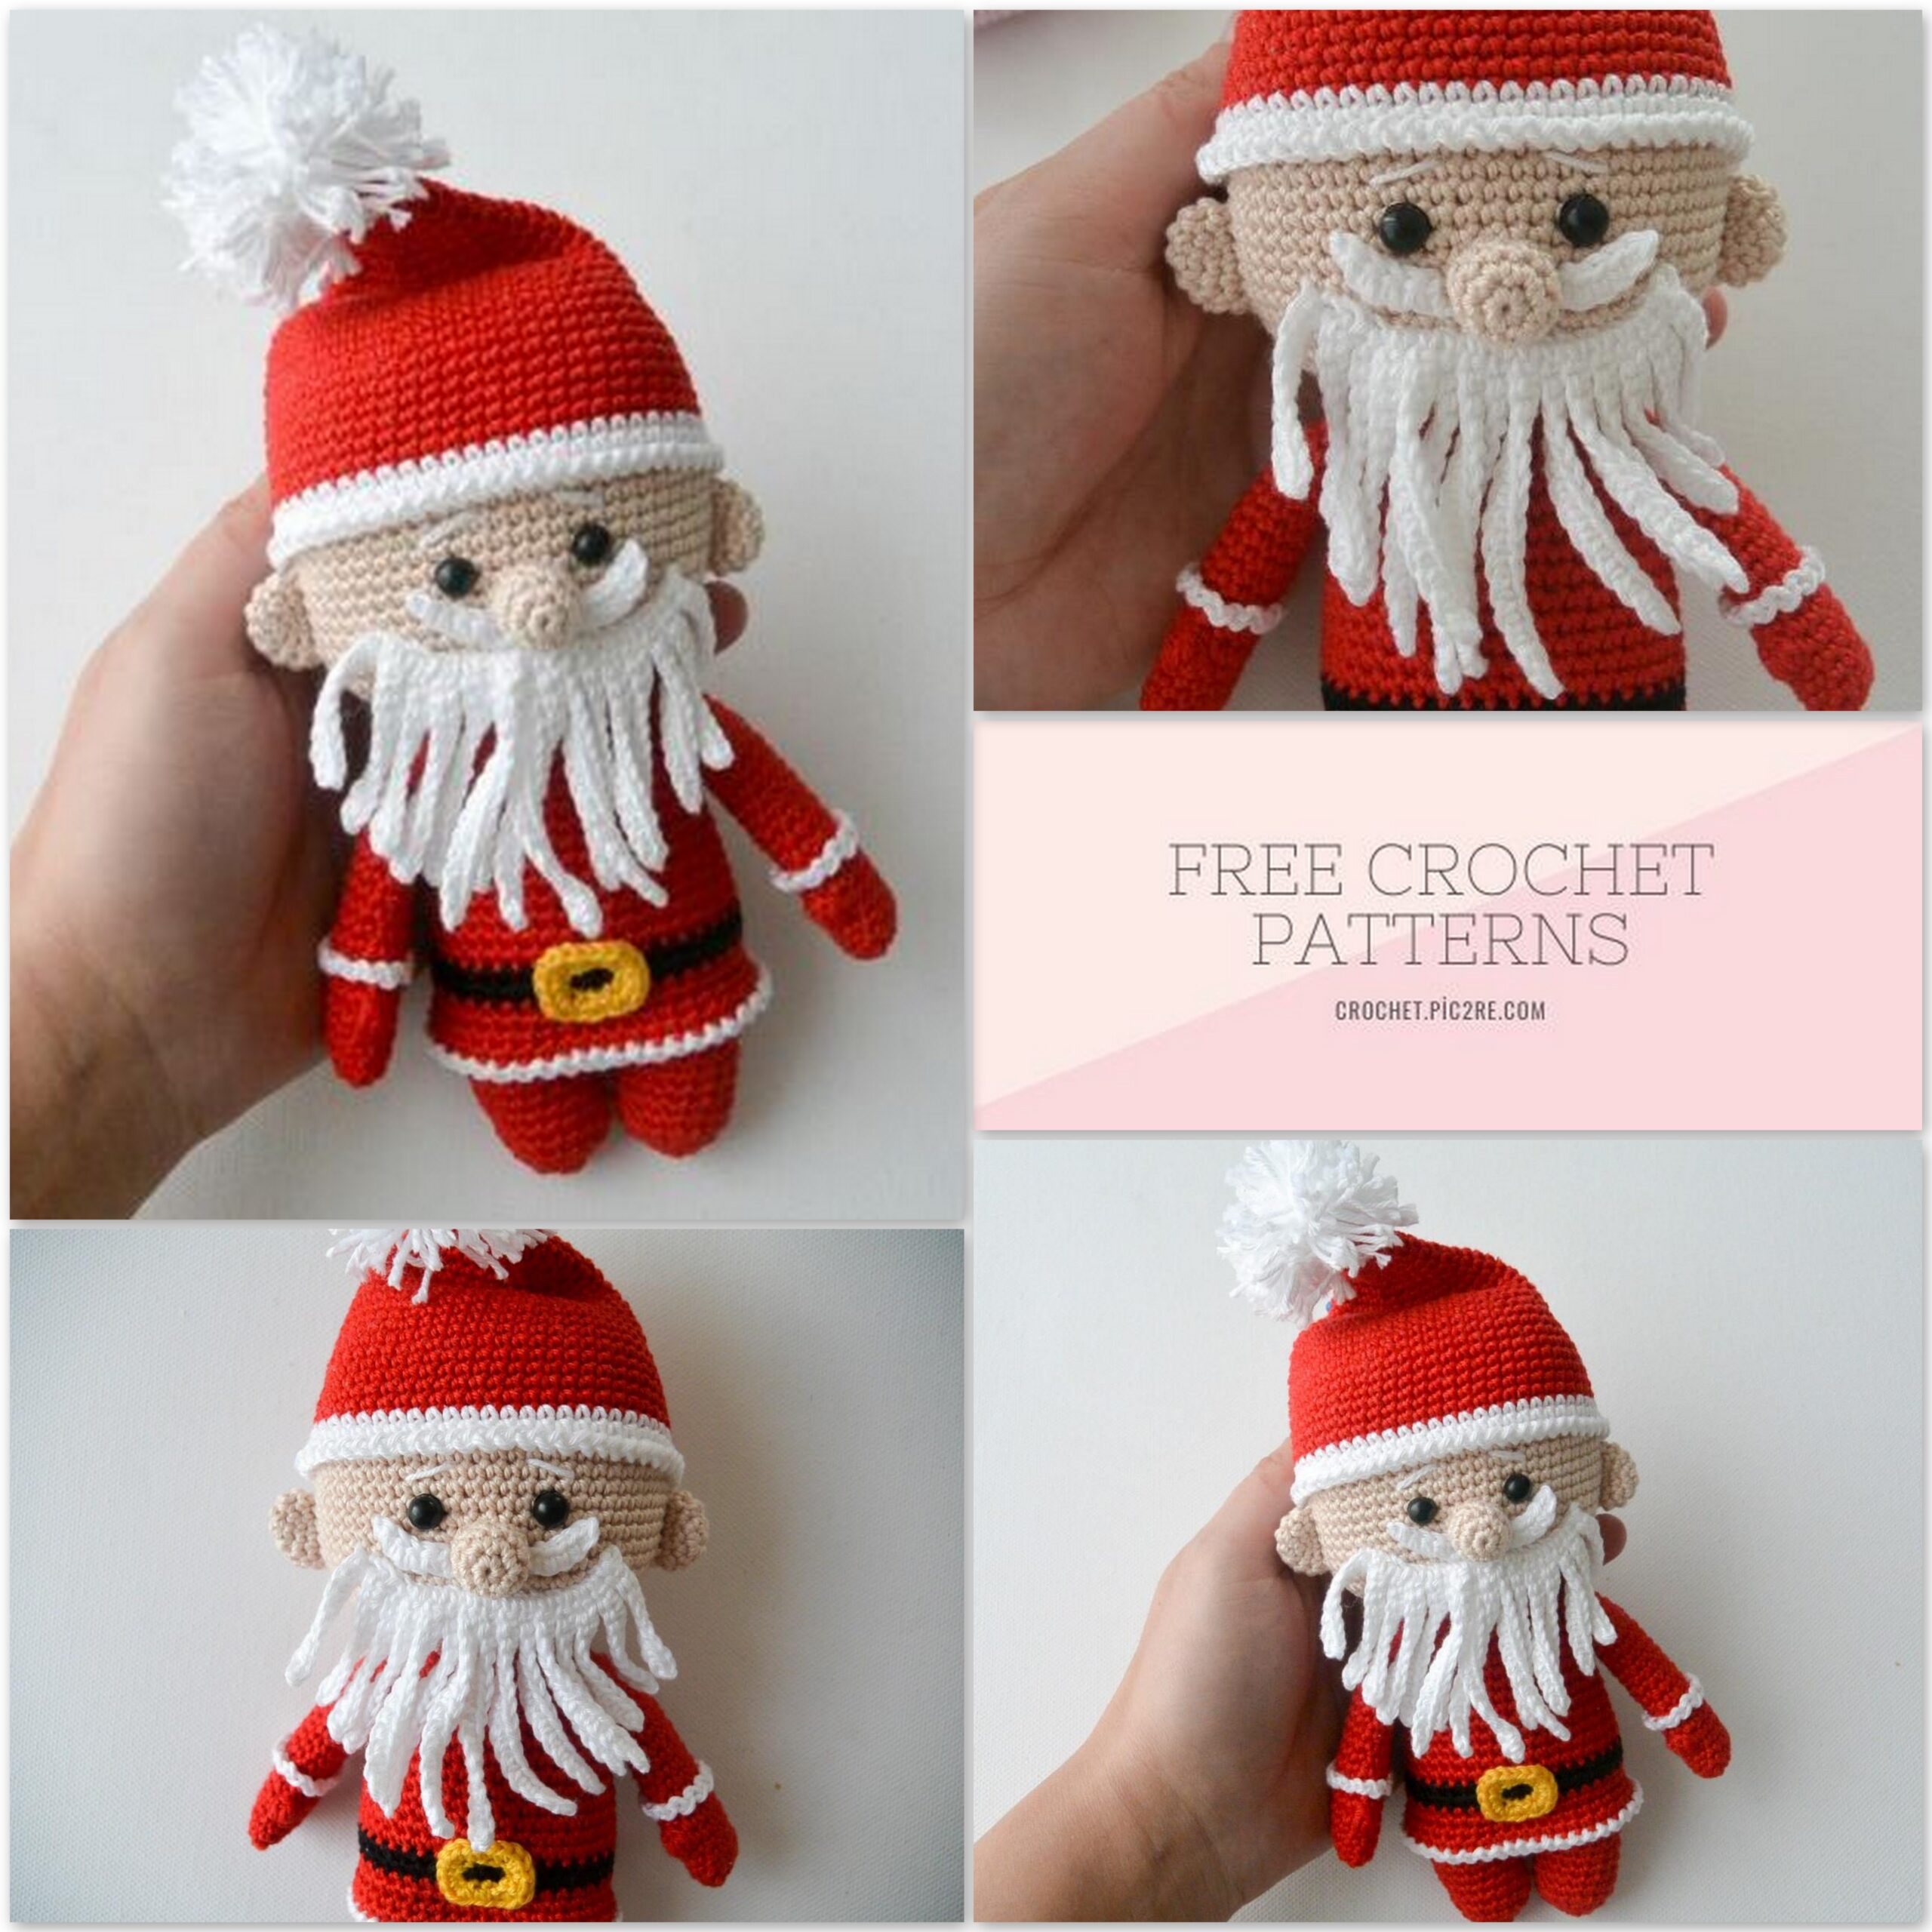
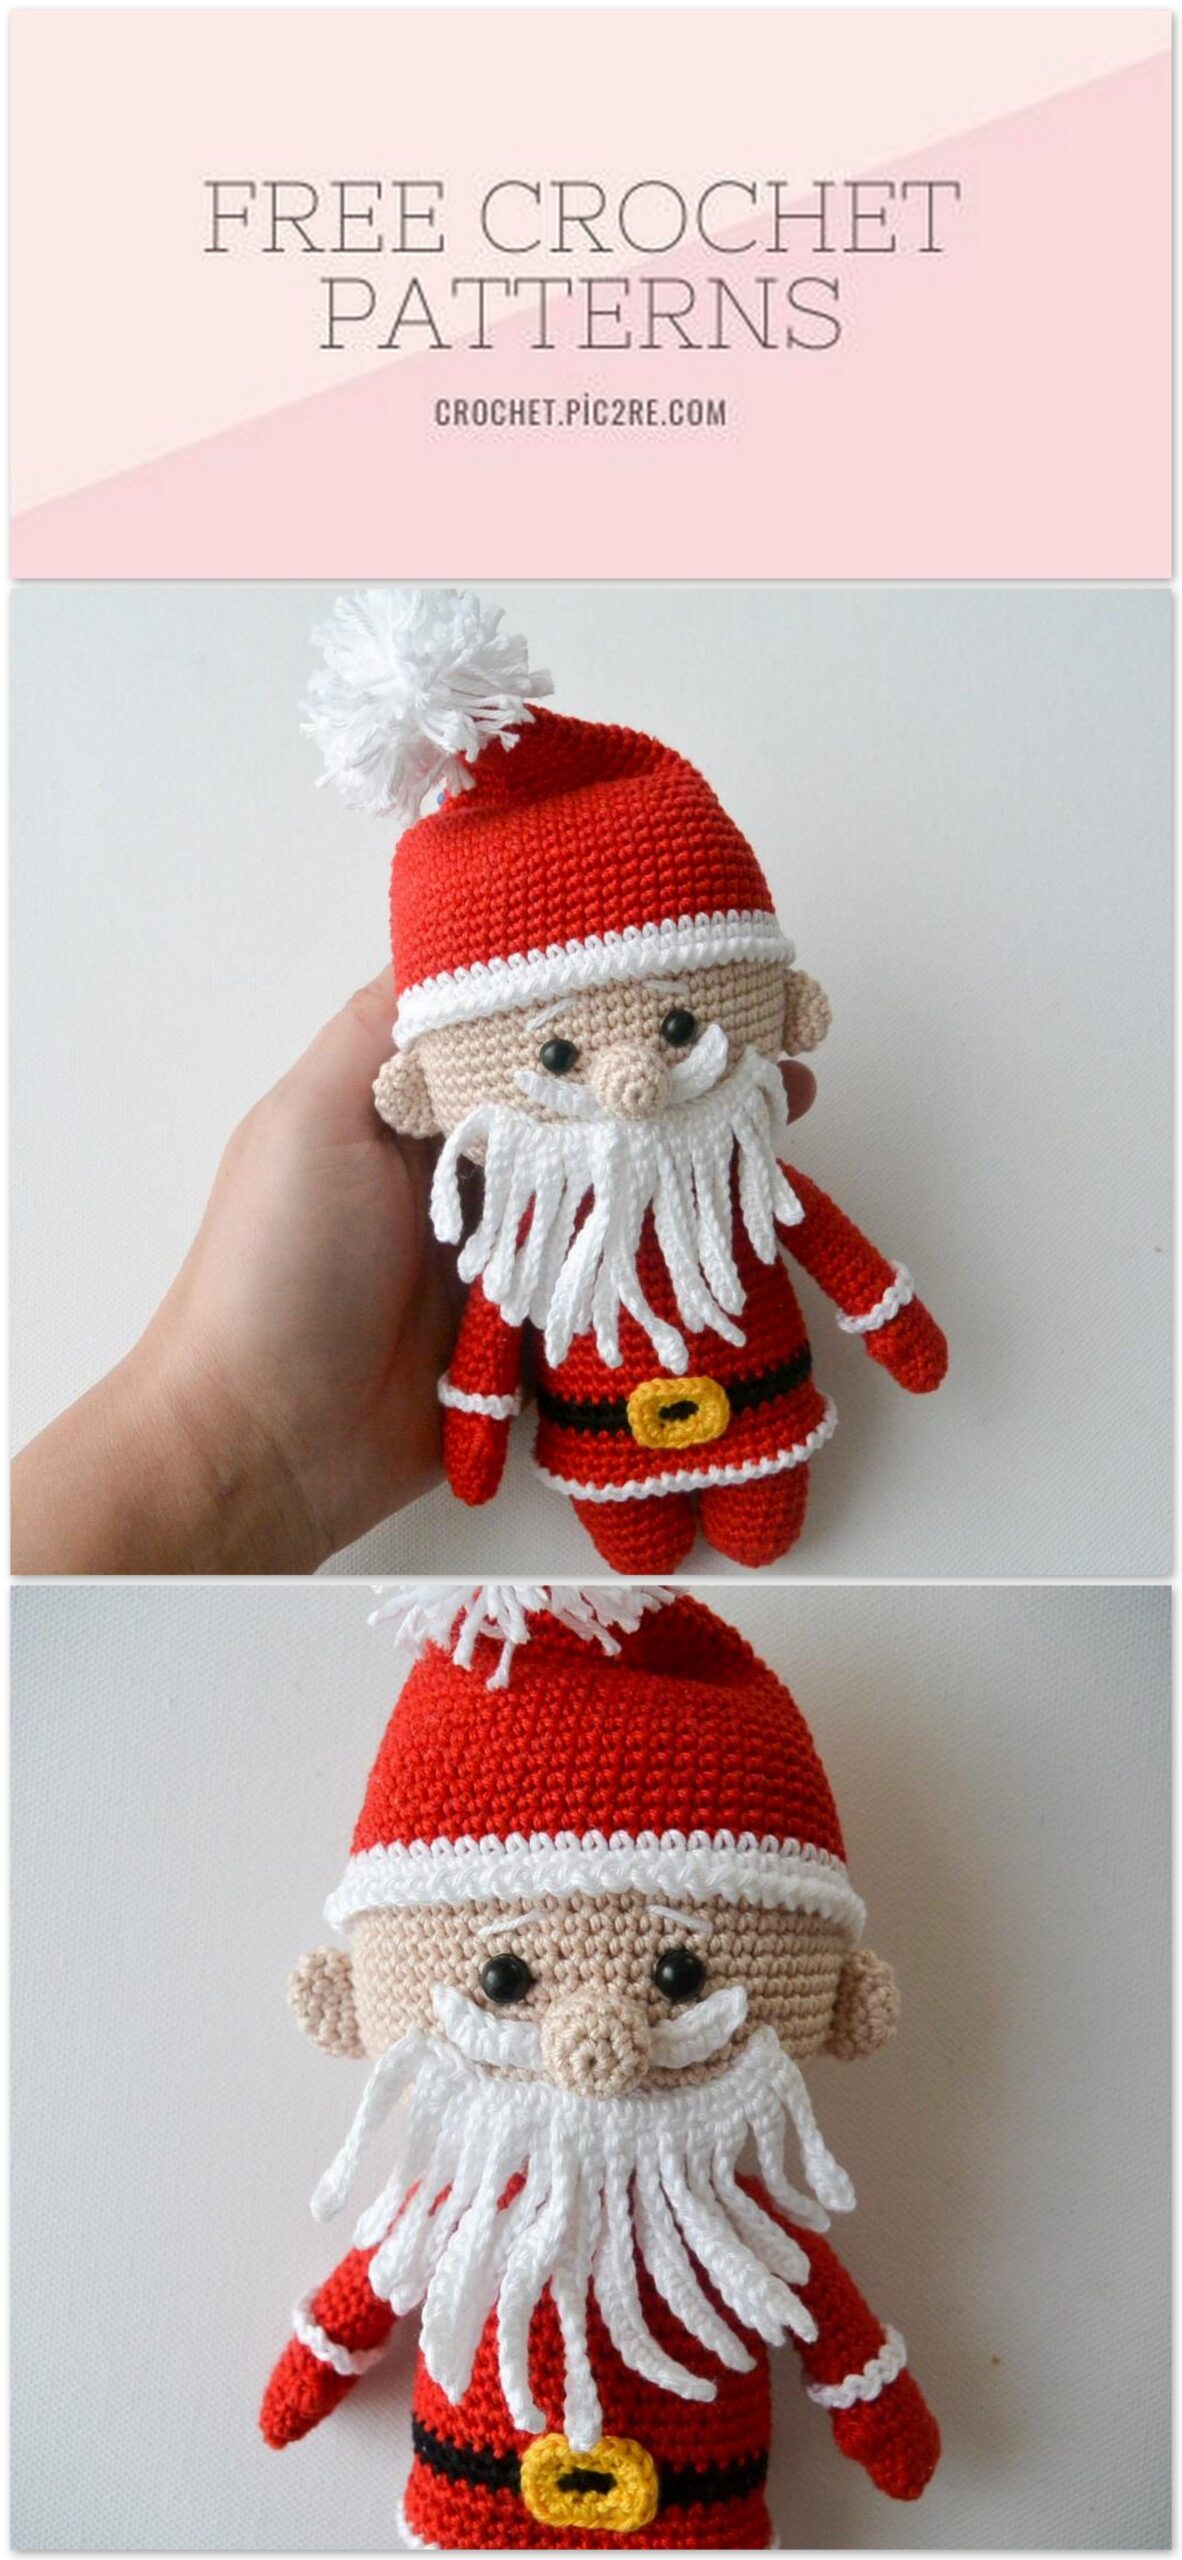
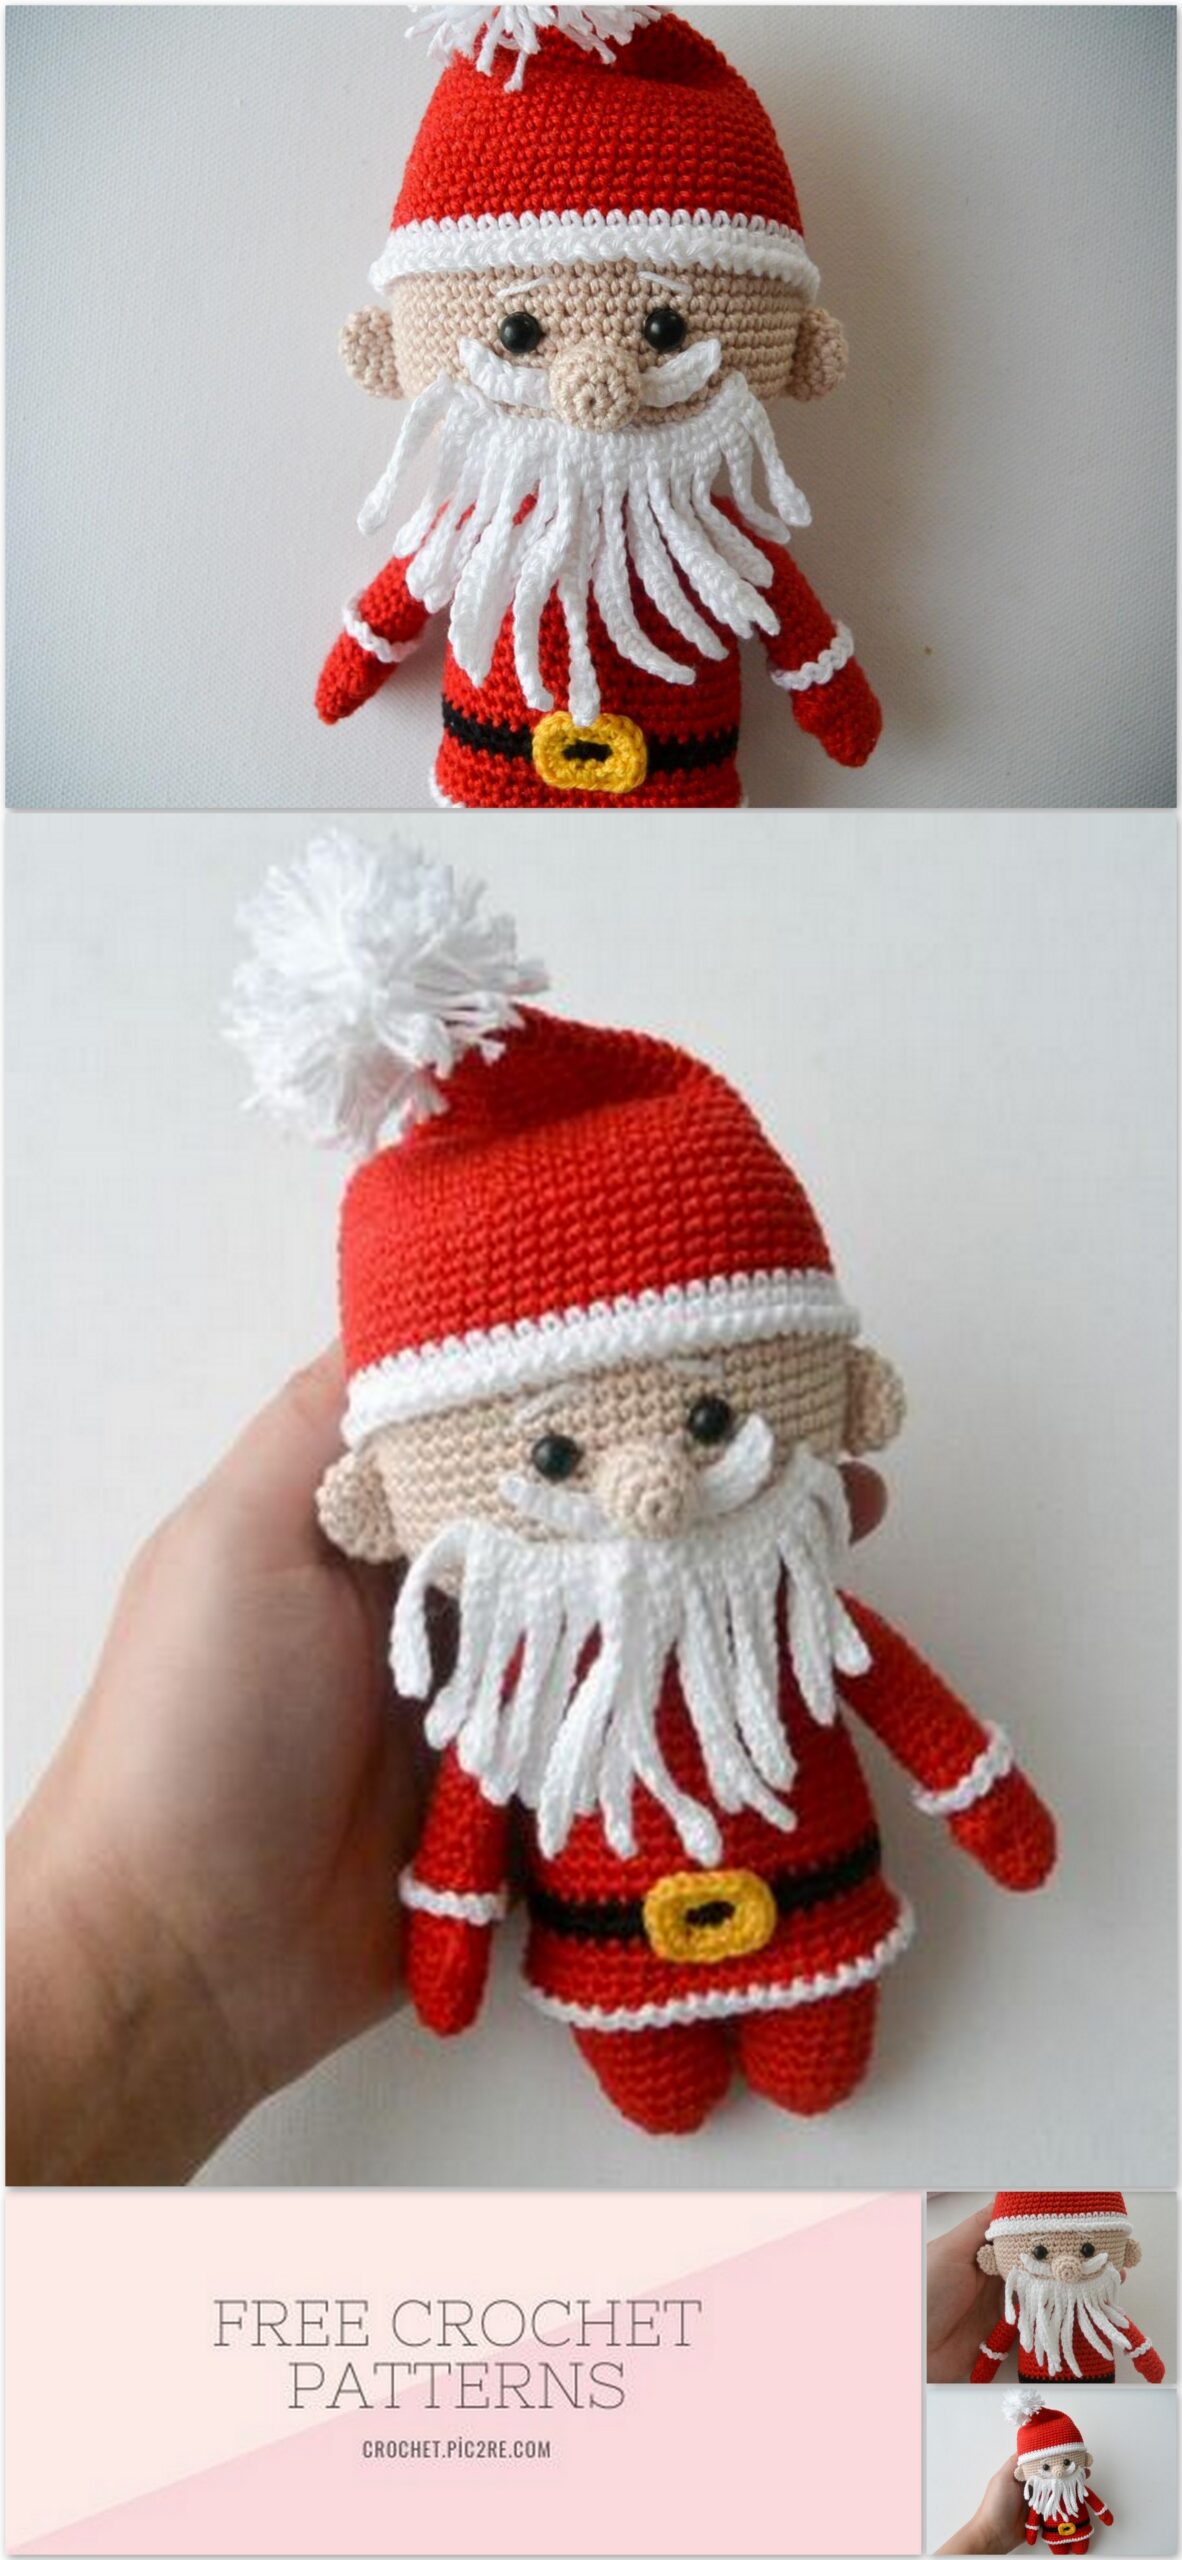
Amigurumi Santa Claus Free Pattern
The new year is approaching. We start knitting New Year’s toys. Here is the amigurumi santa claus free pattern. Don’t forget to visit our website for new patterns.
Materials and Tools
Yarn: 1 or more colors. I used Catania cotton in red, white, beige, yellow and black.
Change of colors are only advices, you can choose your own color patterns.
Crochet hook: 2.00 mm.
Stuffing: I use polyester wool and a chopstick to stuff the doll.
Safety eyes 7.00 mm.
Tapestry needle, scissors.
White embroidery thread.
Abbreviations
mr = Magic ring
ch = Chain
dc= Double crochet
st = Stitch
slst = Slip 1 stitch
sc = Single crochet
() = Parentheses are used for repeated patterns of stitches, example: (2 sc, inc) x3 means repeat 3 times (2 single crochet and one increase).
inc = 2 sc in the same stitch
dec = 2 sc together but working in the front loops only
bobble stitch=3 dc bobble
Santa and all parts are crocheted in spiral, don’t join at the end of each round.
Use a stitch marker if you please.
HEAD
Use 2.00 mm hook.
1- 12 crochet chains 12
2- inc on the 2nd ch from the hook, 9 sc, 3 sc on the last chain, turn and work on the other side of the foundation chs, 10 sc 24
3- 2 inc, 9 sc, 3 inc, 9 sc, 1 inc, (fig 1) 30
4- (1 sc, 1 inc) x2, 9 sc, (1 sc, 1 inc) x3, 10 sc, 1 inc 36
5- (2 sc, 1 inc) x2, 9 sc, (2 sc, 1 inc) x3, 11 sc, 1 inc 42
6- (3 sc, 1 inc) x2, 9 sc, (3 sc, 1 inc) x3, 12 sc, 1 inc 48
7- (4 sc, 1 inc) x2, 9 sc, (4 sc, 1 inc) x3, 13 sc, 1 inc, (fig 2) 54
8- 54 sc around 54
9- 5 sc, 1 inc, 26 sc, 1 inc, 21 sc 56
10- 56 sc around 56
11- 6 sc, 1 inc, 27 sc, 1 inc, 21 sc 58
12-20- 58 sc around 58
Attach the safety eyes between rounds 17 and 18 with 7 stitches apart (fig 3).
I use invisible decrease which is worked in the front loops only. Please see the photo tutorial I made for it at the last part of the pattern.
21- 6 sc, 1 dec, 27 sc, 1 dec, 21 sc 56
22- 56 sc around 56
23- 6 sc, 1 dec, 26 sc, 1 dec, 20 sc 54
24- 54 sc around 54
25- (1 dec, 4 sc) x3, 9 sc, (1 dec, 4 sc) x3, 9 sc 48
26- (1 dec, 3 sc) x3, 9 sc, (1 dec, 3 sc) x3, 9 sc 42
27- (1 dec, 2 sc) x3, 9 sc, (1 dec, 2 sc) x3, 9 sc 36
28- (1 dec, 1 sc) x3, 9 sc, (1 dec, 1 sc) x3, 9 sc 30
29- 3 dec, 9 sc, 3 dec, 9 sc, (fig 4) 24
Stuff the head firmly, especially the bottom part.
How to change the color of yarn:
With the two loops from the previous yarn on your hook (fig 5), wrap the new yarn around the hook, pull the new yarn through the two loops of the stitch (fig 6, 7).
BODY
30- change the color of yarn to red: 24 sc around 24
31- (3 inc, 9 sc) x2 30
32- (1 sc, 1 inc) x3, 9 sc, (1 sc, 1 inc) x3, 9 sc 36
33-34 36 sc around 36
Stuff the body and don’t cut the yarn.
LEGS
Now we are going to make the legs.
Please, don’t move your marker, the next stitch will be the first stitch of the left leg (fig 10).
Left leg: crochet 18 stitches (round 50). Then put your hook through the other side (fig 11) and make the next 18 sc (round 51). Follow the pattern to make the rest of the left leg.
35- 5 sc, 1 inc, 17 sc, 1 inc, 12 sc 38
36- 38 sc around 38
37- 6 sc, 1 inc, 18 sc, 1 inc, 12 sc 40
38- 40 sc around 40
39- 7 sc, 1 inc, 19 sc, 1 inc, 12 sc 42
40-43- 42 sc around 42
44- change the color of yarn to black and don’t cut the red: 42 sc around 42
45- black yarn: 42 sc around, (fig 8) 42
46- change the yarn to red and cut the black: 42 sc around 42
47- 42 sc around 42
48- use only back loops: 42 sc around 42
49- 8 sc, 1 dec, 19 sc, 1 dec, 12 sc, (fig 9) 40
50- 18 sc around 18
51- 18 sc around, (fig 12) 18
52- 8 sc, 1 dec, 7 sc, 1 inc 18
53-54- 18 sc around 18
55- 8 sc, 1 dec, 7 sc, 1 inc 18
56-57 18 sc around, start to stuff the leg 18
How to close the end of the round: with a darning needle, pull the remaining yarn through all the
front loops of the stitches on the last round (fig 13). Pull all together at once and sew to hide the
yarn inside the part you are working on.
Right leg: lay the doll facing away from you.
From the right leg’s first round, count 2 stitches on both sides, then insert your hook across both stitches (fig 14). Pick up the yarn and pull it through. Make a slip stitch. Then insert your hook again in the same stitch and crochet the first stich of the right leg. Follow the pattern to make the right leg.
First st of right leg
Use the tail yarn to sew and close any gaps between the legs.
Making the jacket:
Turn the body upside down. Go back to round 48 and work in the front loops (fig 19). Insert your hook in the first loop and pick up the yarn. Make a slip stitch, then crochet 1 sc in each loop. You should have 42 stiches around the body (fig 21, 22). Join with the first stitch.
Make the second round in the same way, 1 sc in each stitch. Total 42 sc, and join with the first stitch of round 2.
58- (1 sc, 1 dec)x6 12
59- (1 dec) x6 6
Attach the white yarn and make a combination of 1 chain and 1 slip stitch in each chain (fig 23, 24).
NOSE
Use the 2.00 mm hook.
1- 6 sc in magic ring 6
2- (1 inc) x6 12
3-4- 12 sc around 12
Stuff the nose. Cut the yarn keeping a tail.
EARS
Use the 2.00 mm hook.
1- 6 sc in magic ring 6
2- (1 inc) x6 12
3-4- 12 sc around, (fig 25) 12
Cut the yarn keeping a tail.
MUSTACHE
Crochet 6 chains. Turn your work, sc all the way back starting in the 2nd ch from the hook to make 5 sc in total (fig 26).
Cut the yarn and leave a tail.
BEARD
Crochet 16 chains. Turn your work and make a slip stitch in 2nd chain.
Now we are going to make the pieces of the beard.
First piece: crochet 10 chs (fig 27), starting on the 2nd ch from the hook, sc all the way back with a total of 9 sc (fig 28). Follow the pattern below to make the next pieces.
1. 1 slst, 10 ch, turn and work on the 2nd ch from hook 9
2. 1 slst, 11 ch 10
3. 1 slst, 12 ch 11
4. 1 slst, 13 ch, (fig 29) 11
5. 1 slst, 14 ch 13
6. 1 slst, 15 ch 14
7. 1 slst, 16 ch, (fig 30) 15
8. 1 slst, 17 ch 16
9. 1 slst, 16 ch 15
10. 1 slst, 15 ch 14
11. 1 slst, 14 ch 13
12. 1 slst, 13 ch 12
13. 1 slst, 12 ch, (fig 31) 11
14. 1 slst, 11 ch 10
15. 1 slst, 10 ch 9
ARMS
Use the 2.00 mm hook.
1- 5 crochet chains 5
2- inc on the 2nd ch from the hook, 2 sc, 3 sc on the last chain, turn and work on the other side of the foundation chs, 3 sc 10
3- (1 inc, 4 sc) x2 12
4-6- 12 sc around 12
7- Left arm: 1 sc, make a bobble stitch, 10 sc, (fig 32)
Right arm: 8 sc, make a bobble stitch, 3 sc, (fig 33) 12
How to make a bobble stitch (3 dc bobble):
– Yarn over and insert your hook in the next stitch.
– Grab the working yarn and pull it. Then again grab the yarn and pull it through first two loops on the hook. We made an incomplete double crochet stitch. There are 2 loops on your hook.
– This operation is repeated three times. As a result, you should have 4 loops on your hook.
– Grab the working yarn and pull through all 4 loops on your hook. We made one bobble stitch.
8-9- 12 sc around 12
10- Use only back loops: 12 sc around 12
11-21- 12 sc around 12
22- (4 sc, 1 dec) x2 10
Stuff the arms lightly.
Flatten it and close the opening by doing 4 sc. Leave a tail for sewing.
Go back to round 10 and work in the front loops. Attach the white yarn and make a combination of 1 chain and 1 slip stitch in each loop (fig 34, 35).
HAT
Use the 2.00 mm hook.
1- 6 sc in magic ring 6
2- (1 sc) x6 12
3- 12 sc around 12
4- (3 sc, 1 inc) x3 15
5- 15 sc around 15
6- (4 sc, 1 inc) x3 18
7- 18 sc around 18
8- (5 sc, 1 inc) x3 21
9- 21 sc around 21
10- (6 sc, 1 inc) x3 24
11- 24 sc around 24
12- (3 sc, 1 inc) x6 30
13- 30 sc around 30
14- (4 sc, 1 inc) x6 36
15- 36 sc around 36
16- (5 sc, 1 inc) x6 42
17- 42 sc around 42
18- (6 sc, 1 inc) x6 48
19- 48 sc around 48
20- (7 sc, 1 inc) x6 54
21- 54 sc around 54
22- (17 sc, 1 inc) x3 57
23-28- 57 sc around 57
29-30- Change the yarn to white: 57 sc around 57
Now we are going to decorate the hat. Make a combination of 1 chain and 1 slip stitch in each chain.
Crochet losely, not over tighten (fig 36).
There are a few ways on how to make a pompom. You can either use a fork, pompom maker, or even with your fingers.
I did mine with my two fingers. I wrapped the yarn many times until I’m satisfied on how big I want my pompom to be. The more times you wrap, the fluffier the pompom will be.
BELT BUCKLE
Start with 12 chains and connect the last chain to the first chain by a slip stich. Make a combination: (2 sc, 3 sc in next chain) x4. Cut the yarn keeping a tail of yarn.
ASSEMBLING:
– Sew the nose in the center just below the eyes.
– Sew the mustache on both sides of the nose. Embroider the eyebrows using the tail of white yarn.
– Sew the ears onto the head.
– Sew the arms onto the body.
– Sew the beard onto the head.
– And last sew the belt buckle onto the body.
How to make an invisible decrease:
Insert your hook in the front loops (a) and then (b) (fig 1), go in the front loop (a) and in (b) (fig 2, 3). Yarn
over and pull through the front loops (a) and (b) (fig 4). Yarn over and pull through the 2 remaining loops (fig 5).